Graphics Programs Reference
In-Depth Information
If you're not quite comfortable with manually adjusting each image,
at correcting the overall exposure of your image (including contrast, highlights,
Camera Raw does come with a one-click Auto function, which takes a stab
shadows, etc.), and at this point in Camera Raw's evolution, it's really not that bad.
If you like the results, you can set up Camera Raw's preferences so every photo,
upon opening in Camera Raw, will be auto-adjusted using that same feature.
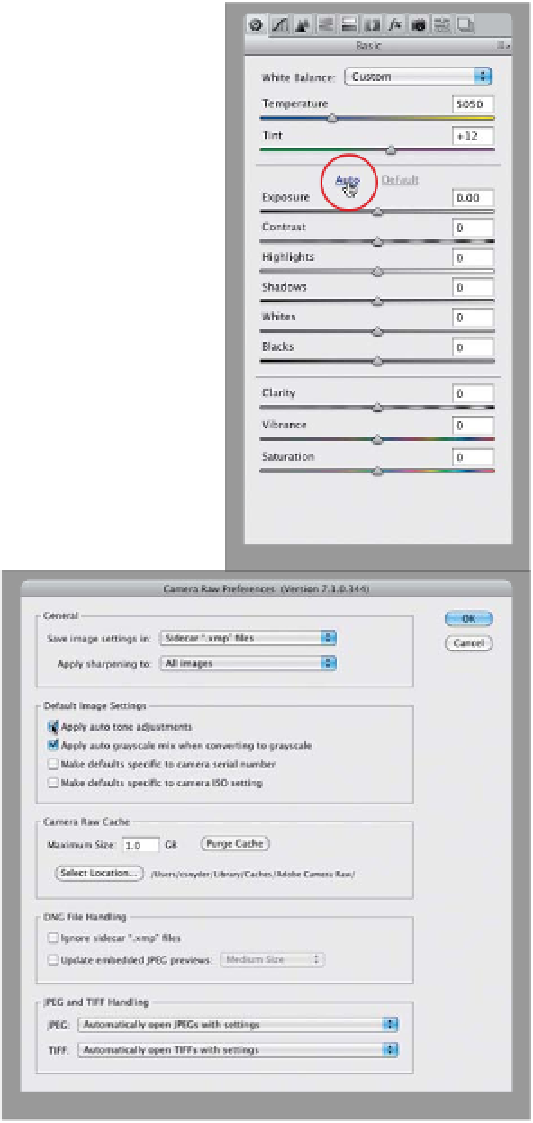
Step One:
Once you have an image open in Camera
Raw, you can have Camera Raw take a
stab at setting the overall exposure (using
the controls in the Basic panel) for you
by clicking on the Auto button (shown
circled in red here). In older versions of
Camera Raw, this Auto correction feature
was…well…let's just say it was less than
stellar, but it's gotten much better since
then, and now it does a somewhat de-
cent job (especially if you're stuck and
not sure what to do), so click on it and
see how it looks. If it doesn't look good,
no sweat—just press
Command-Z (PC:
Ctrl-Z)
to Undo.
Step Two:
You can set up Camera Raw so it automat-
ically performs an Auto Tone adjustment
each time you open a photo—just click on
the Preferences icon up in Camera Raw's
toolbar (it's the third icon from the right),
and when the dialog appears, turn on the
checkbox for Apply Auto Tone Adjust-
ments (shown circled here), then click OK.
Now, Camera Raw will evaluate each
image and try to correct it. If you don't
like its tonal corrections, then you can
just click on the Default button, which
appears to the right of the Auto button
(the Auto button will be grayed out be-
cause it's already been applied).


