Graphics Programs Reference
In-Depth Information
If you wind up doing all your edits from right within Camera Raw,
and then you save straight to a JPEG or TIFF right from Camera Raw, as well
in Camera Raw
(skipping the jump to Photoshop altogether), you'll still want to sharpen your
image for how the image will be viewed (onscreen, in print, etc.). This is called
“output sharpening” (the sharpening you do in Camera Raw's Detail panel is
called “input sharpening,” because it's designed to replace the sharpening that
would have been done in your camera if you had shot in JPEG or TIFF mode).
Step One:
Before we do this output sharpening, it's
important to note that this sharpening
only kicks in if you're going to save your
image from right here within Camera Raw
by clicking the Save Image button in the
bottom-left corner of the Camera Raw
window. If you click the Open Image or
Done button, the output sharpening is
not applied. Okay, now that you know,
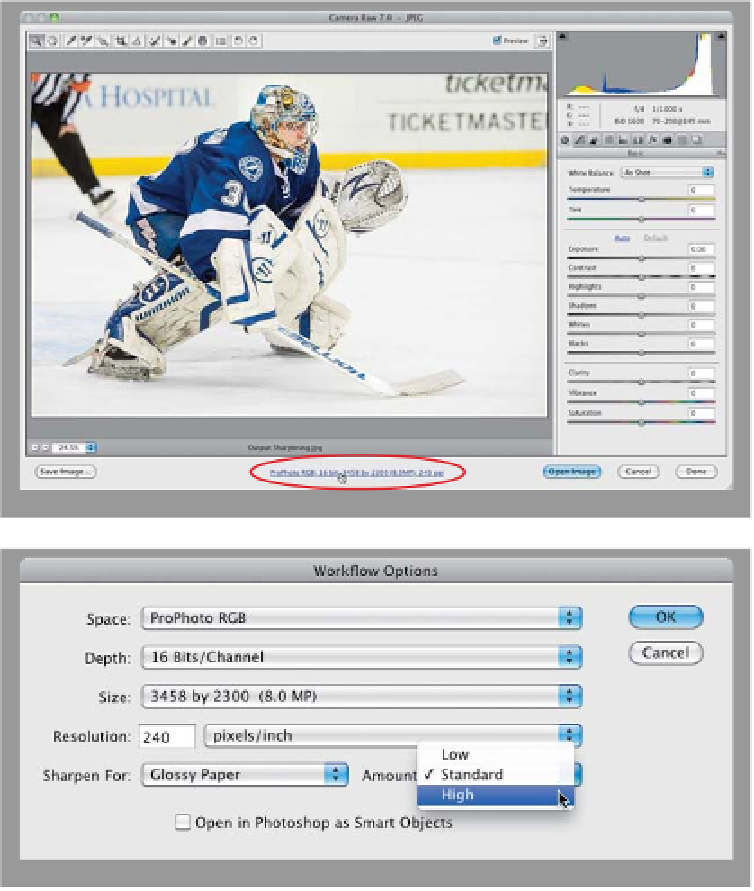
you find output sharpening by clicking
on the line of text (which looks like a
web link) below the Preview area (it's
circled here in red).
Step Two:
First, choose how you want this image
sharpened from the Sharpen For pop-
up menu near the bottom: Screen is for
images you're going to post on the web,
email to a client, or present in a slide show.
If the image is going to be printed, choose
whether you'll be printing to Glossy Paper
or Matte Paper. Lastly, choose the amount
of sharpening you want from the Amount
pop-up menu. Camera Raw will do the
math based on the image's resolution,
your Sharpen For choice, and Amount
choice (I never choose Low, by the way)
to calculate the exact right amount of
output sharpening.
Note:
When you click
OK, the sharpening stays on from now
on. To turn it off, choose
None
from the
Sharpen For pop-up menu.