Graphics Programs Reference
In-Depth Information
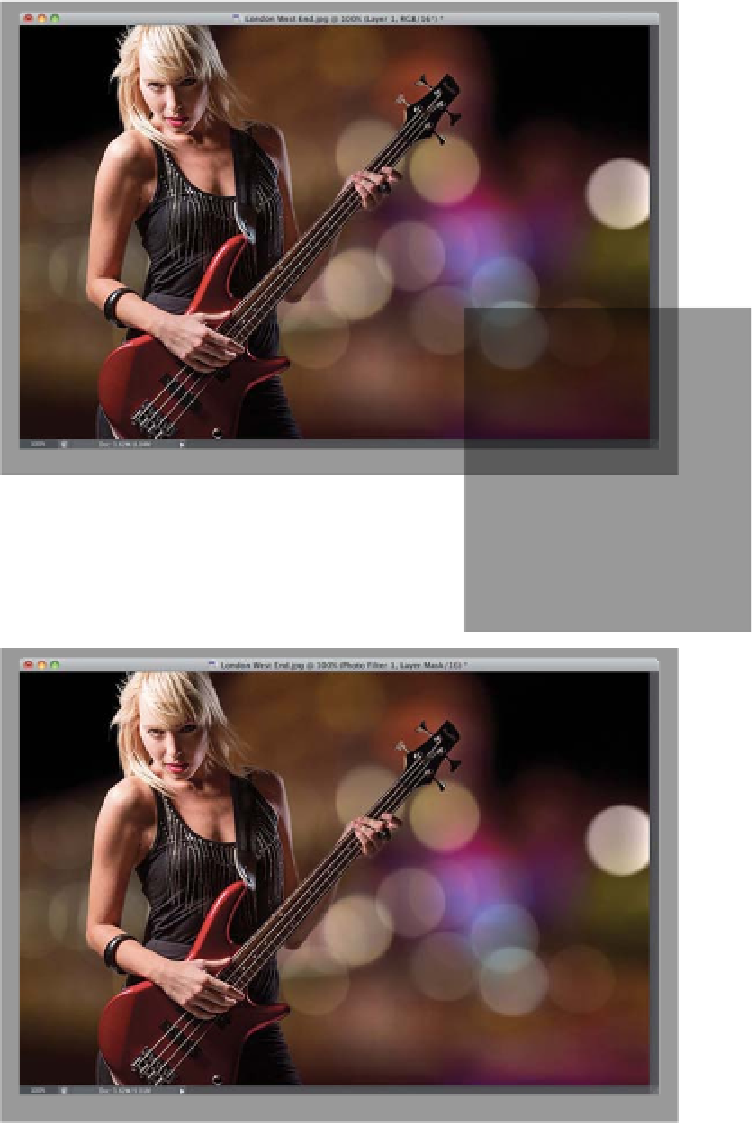
Step Seven:
Go back to the document where you
have your subject selected and press
Command-C (PC: Ctrl-C)
to copy your
subject into memory, then switch to
your background document and press
Command-V (PC: Ctrl-V)
to paste your
subject into the background (or you can
just get the Move tool
[V]
and drag-
and-drop the layer your subject is on
over onto your background document).
I positioned our subject away from the
blooming bright white light also found
on the far right, and I made her a little
bit larger by using Free Transform (press
Command-T [PC: Ctrl-T]
, then Shift-
click on one of the top corner points
and drag it upward to scale her up just
a small amount. If you drag too far, she
will start to look pixelated, so be careful
not to scale her up too much).
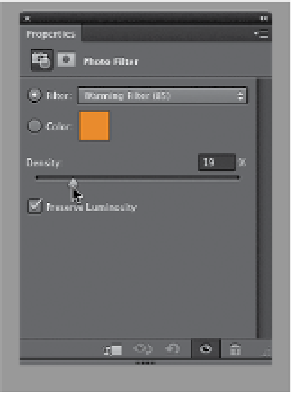
Step Eight:
Lastly, to make your subject look more
like she was shot on this warm-colored
background, we're going to warm that
photo of her up a little bit, too. Start by
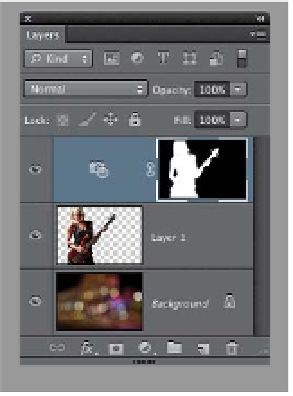
going to the Layers panel and Command-
clicking (PC: Ctrl-clicking) directly on the
thumbnail for your subject's layer to put
a selection around them. Now, go to the
Adjustments panel and click on the Photo
Filter icon. When the Properties panel
opens with the Photo Filter controls, by
default it warms the photo at an amount
of 25%, but if you think it needs to be a
little more or less warm, drag the Density
slider to the right to make it warmer, or left
to make it not quite as warm (I dragged it
to 19% here).