Graphics Programs Reference
In-Depth Information
Figure 15.26
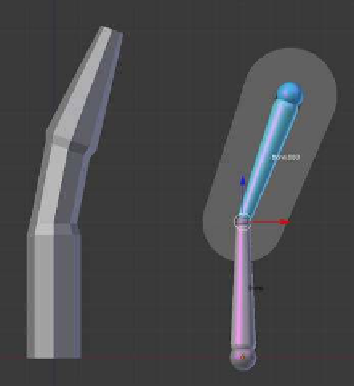
Figure 15.27
The armature and
the finger rotate.
The armature is rotated
but nothing happens to
the finger.
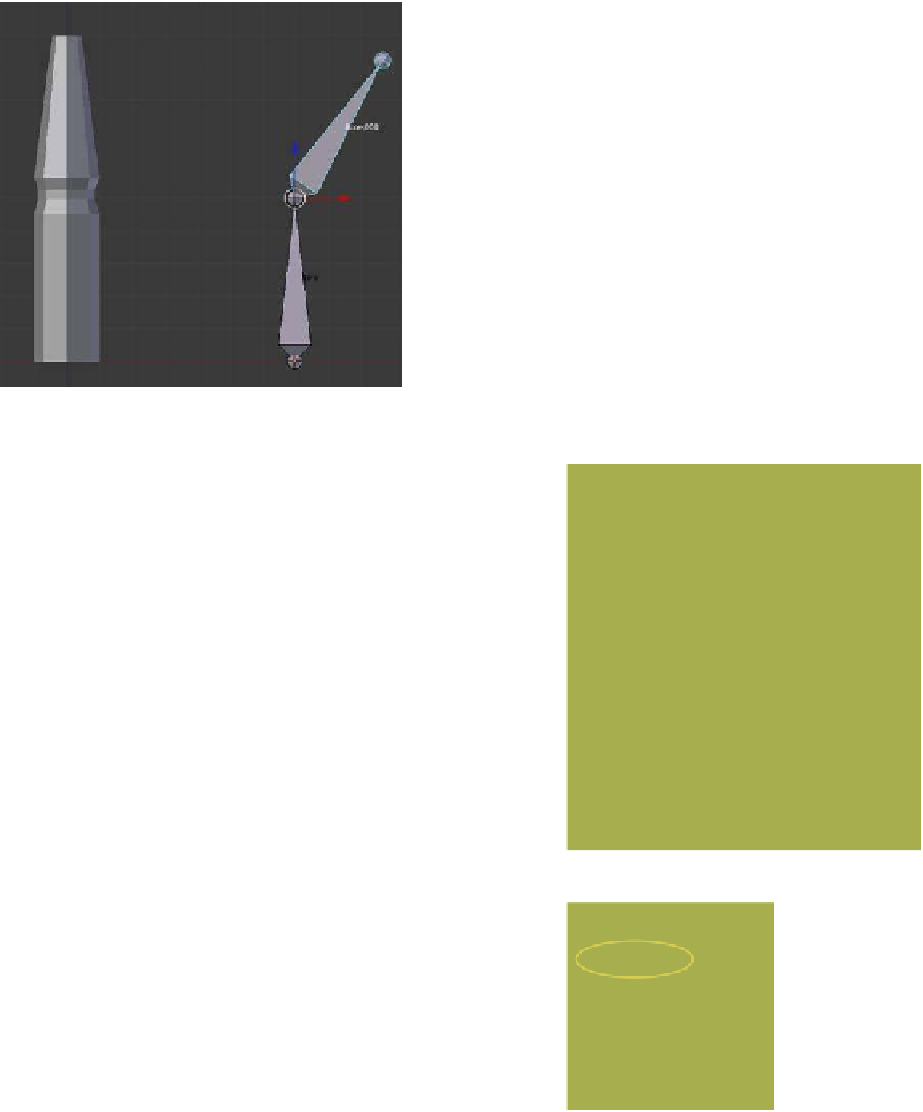
Figure 15.28
click “Add Modifier” and select “Armature.” In the armature “Ob-
ject” panel, click and select “Armature.” Deselect the finger and
select the armature in pose mode. Select “Bone.001” and rotate
it—the upper part of the finger will now deform as the bone is ro-
tated (Figure 15.27). Since the armature is located well away from
the finger, the field of influence of the armature is not enforced
(Figure 15.28).
15.8.2 Method 2: Weight Paint
Instead of selecting vertices, Blender has a painting method that
selects and assigns vertices to a group, automatically linking
them to an armature bone. The paint method allows a graduated
weight to be given to vertices that dictates how much influence
the armature bone will have over the deformation of the mesh.
To begin, set up a new scene the same way you did for
Method 1. Select the finger in object mode and add an arma-
ture modifier in the properties window. Don't forget to enter
“Armature” in the “Object” panel. Select the armature and enter
pose mode. In the properties window - “Object Data” button -
“Display” tab, tick “Names” to display the bone names in the 3D
window; the names should be “Bone” and “Bone.001” as before.
Select “Bone.001” and right click the finger to select it. With the
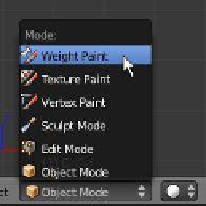
finger selected, go to the 3D window header and change from
object mode to weight paint mode (Figure 15.29). The finger
displays in blue, which indicates that no vertices are selected
(Figure 15.30).
Figure 15.29