Graphics Programs Reference
In-Depth Information
emitted from the large cube are attacked by the swarm of small particles from the small cube
and the cross particles die when they are hit (Figure 13.68).
For simplicity, we are showing only dots and crosses as seen in the 3D window. A render
could show anything you wish by choosing “Object” in the “Render” tab and assigning a
preconstructed mesh object. A complex single frame can take a while to render and a com-
plex animation can take an eternity.
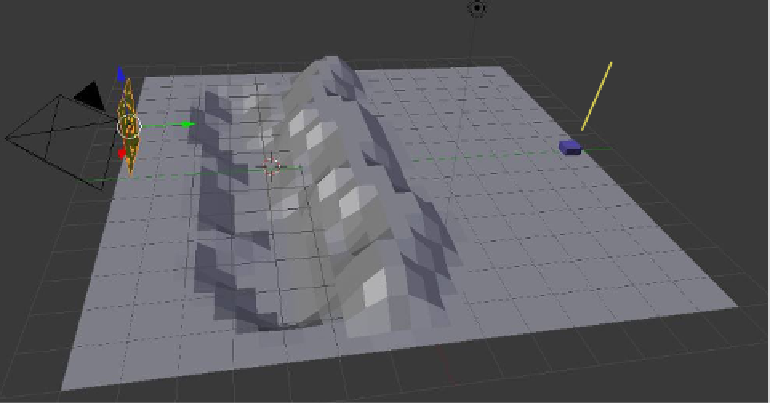
13.11.4 Example: Follow Terrain
Boids particles can be made to emulate herds following a terrain. Set up a new Blender
scene, as shown in Figure 13.69. The cube object is the default cube and will act as a target
to which the particles will be directed. The other two objects in the scene are two planes
with one being scaled up and shaped to act as our terrain. To create the terrain, delete the
cube and add a plane. Scale the plane up four times, tab into edit mode, and subdivide it
five times. Deselect all the vertices and press the C key for circle select mode. Click, hold,
and drag the LMB, selecting a row of vertices from one side of the plane to the other. Press
Esc to cancel the circle select. In the 3D window header, turn on proportional editing. Click
on the blue arrow of the manipulation widget and drag down to form a ditch in the terrain.
Repeat the procedure to form a rise along the side of the ditch.
With the scene assembled, select the objects as listed and perform the following setup in
the properties window:
• Select “Plane.001” (the small plane rotated, which will act as our emitter).
• Add a particle system with boids physics; untick “Allow Flight” and tick “Allow
L a n d .”
• In the “Emission” tab, change the values to “Amount: 100” and “Lifetime:
1500” and change the animation length in the timeline to 1500 frames.
• In the “Boid Brain” tab, add a “Goal” rule, move it to the top of the stack, and
select “Cube” as the goal.
Plane.001
Cube
Plane
Figure 13.69