Graphics Programs Reference
In-Depth Information
•
“Physics” tab
- Select “Boids.”
- Size: 0.030
- Max Air Speed: 7.000 (gives an advantage over the slower prey particles)
- Next to the “Relations” panel, click on the + sign and select “Enemy.”
•
“Boid Brain” tab
-
The default “Separate” and “Flock” rules are applied. Add a “Fight” rule and
move it to the top of the stack.
Prey particles.
Select the large cube in the 3D window, add a particle system, and change
the following settings:
•
“Emission” tab
- Amount: 10
- Lifetime: 1500
•
“Display” tab
- Select “Cross” and set the “Draw Size” value to 10.
•
“Physics” tab
- Select “Boids.”
- Size: 0.030
- Max Air Speed: 1.000 (combined with its size, this makes the prey bigger
and slower)
- Relations: Click the + sign then click in the target selection box below the
window and select “Cube”—now “Cube: Particle System” displays in the
window. Select “Enemy.”
•
“Boid Brain” tab
-
The default “Separate” and “Flock” rules are applied. Add a “Fight” rule and
move it to the top of the stack.
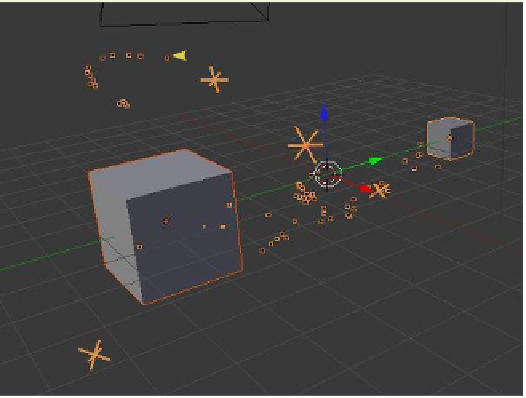
Figure 13.68
Go back to the predator and repeat
the “Relations” setup, this time selecting
“Cube.001” as the target (you cannot set up
“Relations” until the other object has a parti-
cle system). Still in the “Physics” tab with the
larger cube selected, change to Newtonian
physics then tick in the “Die on hit” box.
Change back to boids physics and change the
“End” value to 1500 in the timeline. You may
have to zoom out in the window. Changing
to wireframe display mode gives a better
view of the particle swarms. Shift select both
cubes in the 3D window and play the anima-
tion to see the result; selecting both cubes
draws orange lines around the particles and
makes them more visible. The cross particles
Dot particles attacking
t
h
e cross