Graphics Programs Reference
In-Depth Information
5.4 UV Texture Mapping
For complex models, regular flat, cubic, cylindrical, or spherical texture mapping is not suf-
ficient to accurately place the texture on the surface. This is where UV mapping can help.
The coordinates
u
and
v
are used simply to distinguish from the
x,y,z
-coordinates used in
the 3D window.
UV mapping is accomplished by taking the surface of an object (the model), peeling it
off as you would a skin from an orange, and laying it out flat on a 2D surface. An image is
then superimposed as a texture over the flattened surface (this is known as mapping). The
window for laying out the flattened object is the UV/image editor window. As with every
basic instruction in Blender, it is best to begin with something simple. Although the process
we are describing is for complex surfaces, anything other than simple is going to be confus-
ing at first.
Start with a cube object in Blender's default 3D scene; delete the cube that is loaded
automatically and add a new cube. The default cube comes preloaded with a material and a
texture channel. In our previous discussion on material and textures, I stated that before a
texture could be applied, an object had to have a material. Adding to the scene a new cube
that does not have a material or a texture will demonstrate that neither are necessary to ap-
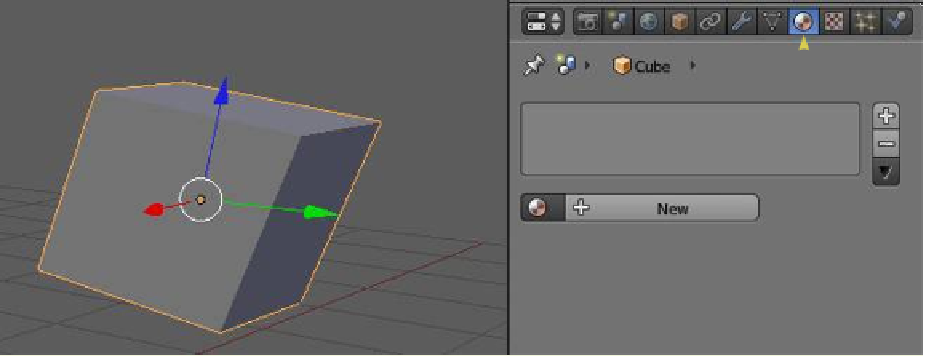
ply UV texture mapping (Figure 5.11).
Properties window - “Material” button
A new cube is added; no material is applied.
Figure 5.11
With the new cube added, split the 3D window in two and change one half to the UV/
image editor. In the 3D window, zoom in on the cube—when you split the window, the
cube is a little too small to see this process clearly. Change the 3D window to edit mode and
select “Textured” as the viewport shading type; this will allow you to see the superimposed
texture (Figure 5.12).
In the 3D window tools panel under “UV Mapping,” click on “Unwrap” to display the
menu for selecting the UV mapping unwrapping type (Figure 5.13). These options allow
you to unwrap the surface of the selected object in a variety of ways. Some of the unwrap-