Graphics Programs Reference
In-Depth Information
Step Seven:
Now that you've learned those two ways
to adjust your white balance (the preset
alone, and then the preset with Temp and
Tint slider tweaks), I want to show you my
personal favorite way, and the way I think
you'll usually get the best, most accurate
results, and that is to use the White Balance
Selector tool (it's that huge eyedropper on
the top-left side of the White Balance sec-
tion). First, choose
As Shot
from the White
Balance pop-up menu, so we're starting
from scratch with this. Now click on the
tool to get it, then ideally, you'd click it on
something in your photo that's supposed
to be light gray (that's right—don't click
on something white, look for something
light gray. Video cameras white balance on
solid white, but digital still cameras need
to white balance on a light gray instead).
In the image we were working on, there
really wasn't anything gray, so here's a
photo taken earlier in the shoot where
she was on a gray background. All you
have to do is click the White Balance
tool on that background and the white
balance is fixed (as seen here).
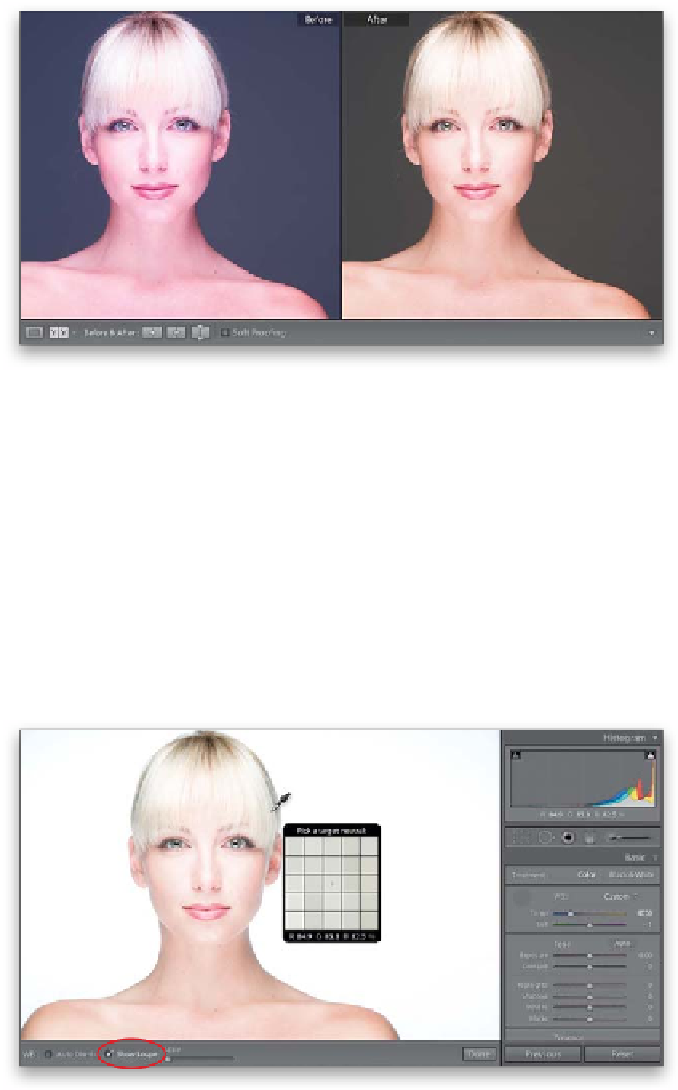
Step Eight:
Before we go any further, that big pixelated
grid that appears while you're using the
White Balance Selector tool is supposed
to magnify the area your cursor is over to
help you find a neutral gray area. To me,
it just gets in the way, and if it drives you
crazy (like it does me), you can get rid of it
by turning off the Show Loupe checkbox
down in the toolbar (I've circled it here in
red, because my guess is you'll be search-
ing for that checkbox pretty quickly). Now
you get just the eyedropper (as shown in
Step Nine), without the huge, annoying
pixel Loupe (which I'm sure is fine for some
people, so if that's you, replace “annoying”
with the term “helpful”).
Continued