Graphics Programs Reference
In-Depth Information
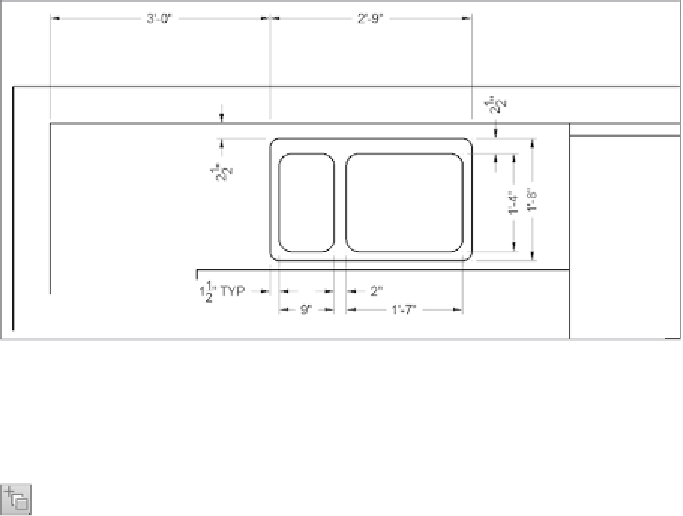
FiGuRE 5.59
The sink with dimensions
This forms the top and bottom edges of the sink. Next, you will
draw the left and right edges of the sink.
3.
From the status bar, turn on Selection Cycling.
4.
Restart the
OFFSET
command, and set the offset distance to
16
″
(
406 mm
).
You're going to offset the right side of the counter 1
′
-4
″
(406 mm)
to the left, but it coincides with the left side of the refrigerator. You'll
use Selection Cycling to ensure that you select the correct line.
5.
At the
Select object to offset
prompt, select the right edge of
the counter.
Because you enabled Selection Cycling in step 3, and both the
right edge of the counter and left edge of the refrigerator coincide
with one another, the Selection dialog box displays (see Figure 5.60).
6.
Select the Line option from the Selection dialog box, and complete the
OFFSET
command by picking a point to the left of the selected line.
Notice how the object highlighted in the Selection dialog box also
highlights (dashes) inside the drawing (see Figure 5.60).
7.
Offset this new line
2
′
-9
″
(
838 mm
) to the left.
This forms the outside edge of the sink (see the top of Figure 5.61).
8.
Fillet the corners of this rectangle to clean them up, using a radius
of zero.

Search WWH ::

Custom Search