Graphics Programs Reference
In-Depth Information
4.
Enter
G
↵ for the Guides option. You'll use the two polylines as guides.
5.
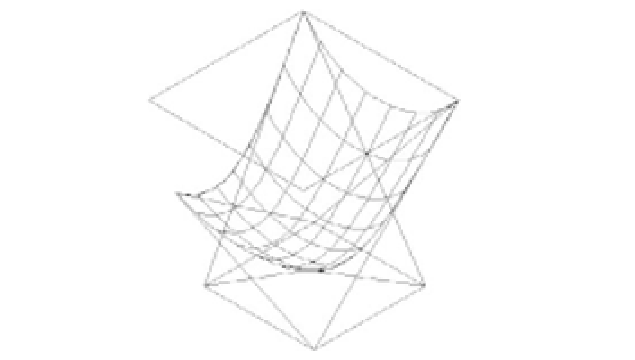
Select the two polylines on the sides of the layout, and then press ↵ to complete your
selection. Your chair begins to take form, as shown in Figure 20.34.
FIGURE 20.34
The butterfly
chair so far
6.
Choose File
Save on the menu bar to save the chair so far.
You've got the beginnings of a butterfly chair with the legs drawn in schematically and the
seat as a 3D surface. You can add some detail by using a few other tools and commands, as
you'll see in the next set of exercises.
Converting the Surface into a Solid
In the previous example, you used the Loft tool to create a 3D surface. Once you have a surface,
you can convert it to a solid to perform other modifications.
You'll want to round the corners of the seat surface to simulate the way a butterfly chair
hangs off its frame. You'll also round the corners of the frame and turn the frame into a tubular
form. Start by rounding the seat surface. This will involve turning the surface into a solid so you
can use solid editing tools to get the shape you want:
1.
Click the Thicken tool in the expanded Solids - Edit tool group of the Tool Sets palette
(Figure 20.35). You can also choose Modify
3D Operations
Thicken on the menu bar
or enter
Thicken
↵ at the Command prompt.
FIGURE 20.35
The Thicken tool
in the Solids - Edit
tool group
Thicken