Graphics Programs Reference
In-Depth Information
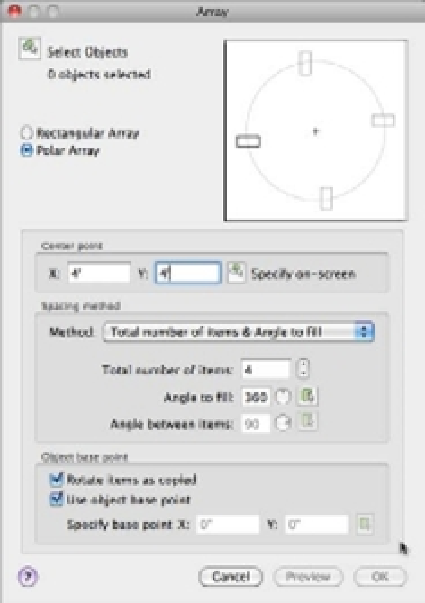
FIGURE 6.3
The Polar Array
options
7.
Right-click and select Snap Overrides
Center, and then place the cursor on the circle.
When you see the circular Osnap marker at the center of the circle, click the mouse. This
selects the circle's exact center for the center of the polar array. After you've clicked, the
Array dialog box returns.
Remember that to access osnaps other than those set up as Running Osnaps, you right-click
and then select Snap Overrides and the osnap you want to use from the resulting menu.
At this point, you've selected an object to array, and you've indicated the center location of
the array. If you've selected the wrong object or the wrong center point, you can go back and
specify these options again.
Now to complete the process, tell AutoCAD the number of copies in the array and the extent
of the array through the circle:
1.
In the Array dialog box, enter
8
in the Total Number Of Items text box. This tells
AutoCAD to make eight copies including the original.
2.
Accept the default of 360 for the Angle To Fill text box. This tells AutoCAD to spread the
copies evenly over the full 360 degrees of the circle. Of course, you can enter other values
here. For example, if you enter 180, the array will fill half the circle.
You can click the Pick Angle To Fill button to the right of the Angle To Fill text box to
graphically select an angle in the drawing. You can also use the circular slider control as
shown in Figure 6.4.