Graphics Programs Reference
In-Depth Information
5.
Make sure before you drag that your cursor is directly
on one of the 3D arrows; your cursor changes to a tiny
light bulb when you're directly over one. Now drag the
bulb to move it around the center of the suitcase. You
cannot drag it away from or toward the object—if you
need more light, read on.
To adjust the properties of a light, double-click on a light
6.
to open the Color editor. The top drop-down list shows
Light 1 color, Light 2 color, and so on. Choose one of the
lights (by default, 2 and 3 are not as bright or as pure in
color as Light 1), and then change its color to something
closer to white. Most all edits in Xara are live, so use your
visual feedback to tell when a light is adjusted correctly.
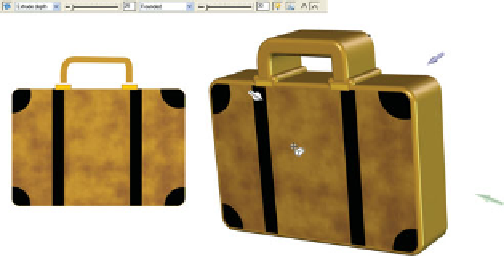
If you'd like an unusual suitcase, you can change the
7.
Bevel type style of the extrude to make the extruded side
chiseled or wavy. Experiment with different styles on
the Infobar drop-down list. The default is Rounded; you
can also achieve neat effects by dragging the Bevel size
slider to the right of the styles drop-down. For example,
a rectangle with rounded corners, a deep extrude
property, rounded edges, and a high bevel size, appears
to bring the front and back faces of the object toward the
middle. The result is something that looks like a cough
drop or a Scandinavian hassock. Figure 1-6 shows the
key controls for the Extrude Tool.
F
IGURE
1-6
Use the Extrude Tool
to project a path in a parallel line
toward the distance.
Bevel type
(style of edge)
Show lights
Corners
Rotate (drag on face)