Hardware Reference
In-Depth Information
Installing an Internal Disk Drive
Installing an internal disk drive in a notebook computer can be a diffi cult process because
the parts are so small; in addition, on most notebooks you must remove many layers to get
to the hard disk. For example, you may need to remove the keyboard to access the chamber
where the hard disk is stored. The diffi culty is compounded by the fact that there are so
many different notebook computer case designs, and each one comes apart differently.
Therefore, it's a good idea to go online and get the service manual for your model of
notebook if it's available. The service manual will provide step-by-step instructions about
what screws and components need to be removed and in what order. If no service manual is
available, you may want to have a professional do the upgrade for you in a computer repair
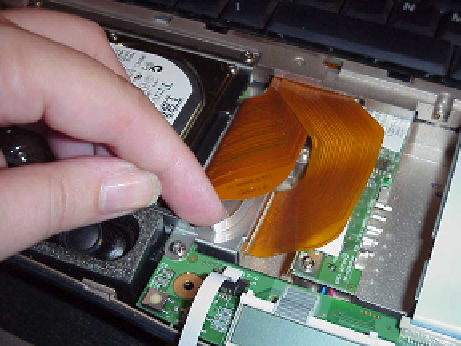
shop. Figure 7.11 shows a PATA hard disk drive in a notebook computer, located under the
touchpad. Notice that the cable is a thin plastic ribbon with very tiny wires, and there is a
plastic loop you can pull to remove the connector from the drive.
FIGURE 7.11
Hard disk in a notebook computer
On the other hand, most users can easily install a new hard disk drive in a desktop PC
with minimal effort. The following sections cover the basic information you need.
Setting Jumpers on a PATA Drive
If you're installing a parallel ATA drive, you have to set a jumper on the drive to tell it if
it's the master, slave, or only drive on that cable, or to tell it that you're using Cable Select
to determine the drive's master/slave status. As you learned in Chapter 2, PATA drives can
be installed two per cable, but only one of them can be in charge. The drive in charge is the
master. It receives all the data from the motherboard, and it passes on any messages to the
other drive—the slave drive—as needed. Jumpers aren't present on a SATA drive because
there is only one SATA drive per cable.