Hardware Reference
In-Depth Information
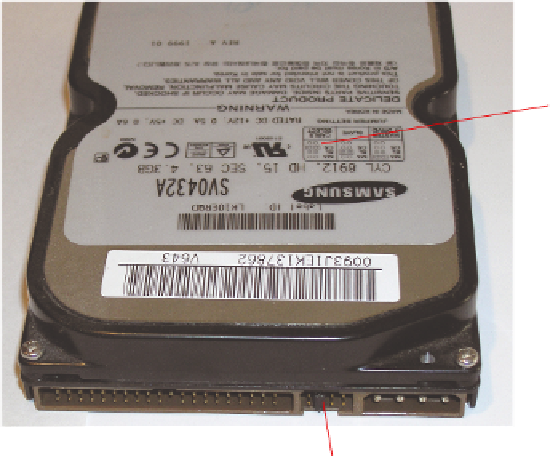
There should be a chart on the drive's label, or lettering above the jumpers, to tell you what
the settings represent (see Figure 7.12). If you don't get the jumper setting right, the drive
may not work and the other drive on that cable may stop working until you get the settings
straightened out.
FIGURE 7.12
Setting the jumper on a PATA drive
Chart describing
jumper settings
Jumper
Selecting a Drive Bay and Installing the Drive
Open the case, and fi nd an available drive bay. A
drive bay
is a chamber inside the PC that
is designed to hold a disk drive. Hard drives don't need to be accessed externally, so you
don't need one of the externally accessible drive bays for it; look for one of the smaller
bays, sized to fi t a hard drive. If there is an existing hard drive, notice how it's held in place
in the case. It may be installed in a metal cage that can be removed from the rest of the
case. You may need to remove the cage in order to attach the screws on the far side of the
new drive. The cage is usually held in place by one or two screws.
All other drives are externally accessible, including DVD and CD drives. If installing an
externally accessible drive, pop off the plastic faceplate in front of an available drive bay.
(It's usually easiest to push it out from the back if you can reach your hand inside that far.)
If there is a metal plate behind the plastic one, pop that out with a screwdriver.
Next, slide the drive into the bay. If you're working with a removable cage for a hard
drive, attach the drive to the cage with screws and then replace the cage in the main case. If
you're installing the drive in a bay that is part of the main case, simply set the drive loosely