Graphics Reference
In-Depth Information
systems have a ton of uses in Blender, and we have a whole section on them coming up later. For now,
though, we'll show you the basics of this specific application.
The interface element at the top of the panel is a new one. It is used whenever a property (like particles,
materials, or texturing) can have multiple entries that apply to a single object. This little window shows all
of the property sets that are attached to the object. LMB clicking on them sets the Properties window to
display the value for that particular entry. In this case, we only need one particle system attached to the head.
LMB click the plus sign (+) to add a new particle system. When you do, the window will be populated with
all of the controls you see in
Figure 6.32
, at their default settings.
The only things we need to change at first are the
Type
in the topmost panel and
Amount
in the
Emission
panel. Set
Type
to
Hair,
because, well, we're making hair. As soon as you do that, your head turns into a
spiny atrocity. Reduce the value of
Amount
from 1,000 to 500. This is the number of spines on the head
that will someday soon be the guidelines for hair. Not that there's anything wrong with 1,000, we're just
trying to follow the 3D principle called “get away with using as little of everything as you possibly can.”
Finally, adjust the
Normal
value in the
Emitter Geometry
section of the
Velocity
panel. That controls how long
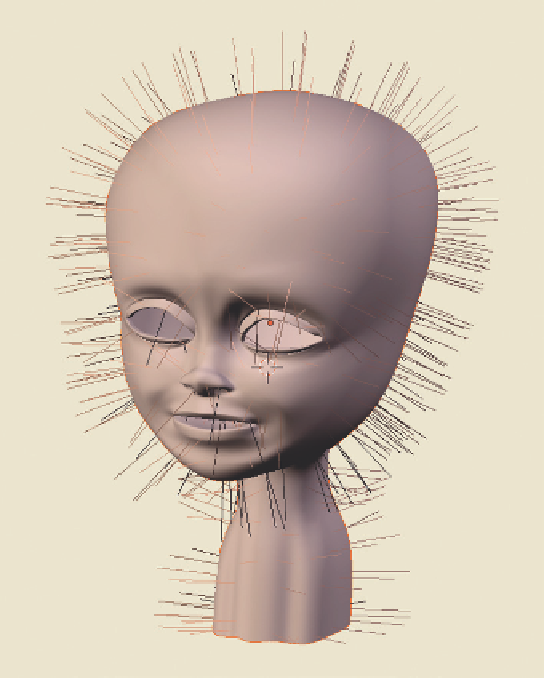
these initial hairs are. I'm not going to give
an exact value here, as the scale of your
own project may differ from the ongoing
example. Use the real-time feedback to
make it look like the hairs are growing
away from the head only 4 or 5 inches.
Figure 6.33
shows what this looks like.
Obviously, this is unacceptable. People
don't have long hair coming out of every
inch of their skin. At least they shouldn't.
Way down at the bottom of the particle
settings is a panel called
Vertex Groups
.
If you expand it, you'll see a bunch of
oddly named fields. The top one,
Density
, allows you to specify the
density of hair growth on the model.
Some places, like the face, should have
zero hair growth. Others, like the top of
the head, should have a lot of growth.
We're going to use this panel, in con-
junction with the Vertex Groups panel,
to restrict the hair growth to the normal
places it would be on a person.
Figure 6.33
Attacked by a porcupine.
Search WWH ::

Custom Search