Graphics Programs Reference
In-Depth Information
16. Add a
Bright/Contrast
node (press
Shift
+
A
and go to
Color
|
Bright/
Contrast
) and paste it between the third (
Musgrave
)
ColorRamp
node
and the
Color2
input of the first
Multiply
node. Set
Contrast
to
-0.700
.
17. Add a
Frame
(press
Shift
+
A
and go to
Layout
|
Frame
). Press
Shift
to
multiselect the four texture nodes, the four
ColorRamp
nodes, the three
Mix
nodes, the
Bright/contrast
node, and
Hue Saturation Value
nodes
and, last, the just added
Frame
. Press
Crtl
+
P
to parent all the selected
elements to the
Frame
. Press
N
in the
Node Editor
window to bring out
the
Active Node
panel and rename the
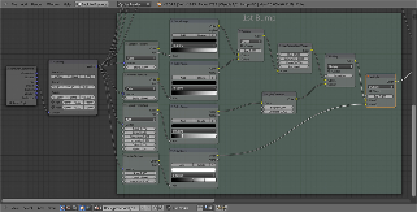
Frame
as
1st Bump
. If you want,
provide a background color to it (by checking the
Custom Color
box).
18. Add a
Voronoi
texture, two
Musgrave
textures, one
Noise
texture (press
Shift
+
A
|
Texture
), and one
ColorRamp
node (Press
Shift
+
A
and go
to
Convertor
|
ColorRamp
). Move them above and adjust the textures
in a column with the
ColorRamp
node to their side. Connect the second
Musgrave
color output to the
Fac
input of the
ColorRamp
node.
19. Set the
ColorRamp
node's interpolation to
B-Spline
and move the white
marker three-fourths to the left. Switch the
Voronoi
texture's coloring
from
Intensity
to
Cell
and set the
Scale
value to
8.000
. Set both the
Musgrave
texture's type to
Hetero Terrain
. Set the first texture's
Scale
to
3.696
and the second's
Scale
to
2.192
. Also, for both the textures,
set
Detail
to
3.500
,
Dimension
to
0.300
, and
Lacunarity
to
3.000
. In
the
Noise
texture, set the
Scale
value to
15.000
,
Detail
to
16.000
, and
Distortion
to
0.400
.
20. Select the
Mapping
node and (press
Shift
) one texture node, and then
press
F
to automatically connect the
Vector
output of the
Mapping
node
to the
Vector
input of the texture. Do this for all the new texture nodes,
one at a time.