Graphics Programs Reference
In-Depth Information
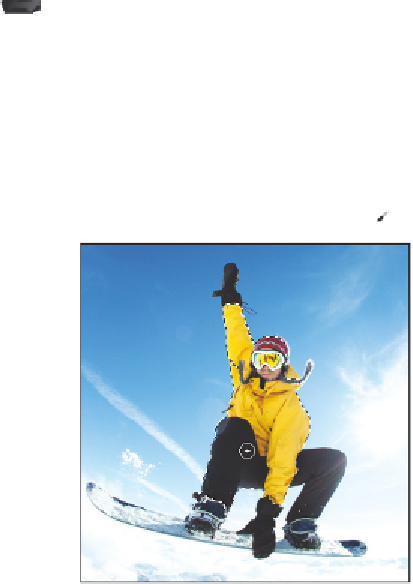
Using the Quick Selection tool
The Quick Selection tool allows you to paint your selection on an image. As you drag,
the selection expands outward and i nds dei ned edges of contrast to use as boundaries for
the selection. In this part of the lesson, you'll re-open the original ps0503.psd image to
make a selection using the Quick Selection tool.
1
Choose File > Browse in Bridge to open Adobe Bridge. Navigate to the ps05lessons
folder inside the pslessons folder. Double-click on ps0503.psd to open the image.
2
Choose File > Save As. When the Save As dialog box appears, navigate to the
ps05lessons folder. In the Name text i eld, type
ps0503_workv2
. Choose Photoshop
from the Format drop-down menu and click Save.
3
Choose View > Fit on Screen to see the entire image in your document window.
4
Choose the Quick Selection tool ( ) in the Tools panel. Keep in mind that this could
be hidden underneath the Magic Wand ( ) tool at this time.
5
Position your cursor over the snowboarder. You see a circle with a small crosshair in
the center (
).
The circle and crosshair will not appear if you have the Caps Lock key depressed.
6
From the Options bar, click the Brush drop-down menu, and either slide the size
slider to the right to a value of 10, or enter
10
into the Size text i eld.
7
Now, click and drag to paint over the snowboarder. You can release the mouse and
continue painting the snowboarder to see that you are adding to the selection.
Adding to the Selection is the default action that you can expect, as you can see by the
selected option in the options bar (
).
Initial selection with the Quick Selection tool.