Graphics Programs Reference
In-Depth Information
12. Render this, and see how it looks. (You
may want to add shadowing, so you can
see what you're really getting, if you
intend to use it in the finished render.
Fur can look very, very different with
and without it.) If you're reasonably
happy with the results so far, it's time
to refine it further.
Refining the Beard andMustache
Mustache hair tends to grow out from the
philtrum (the groove in the center of the
upper lip), often leaving the middle without
hair at all. Since you can't vary the combing
on a surface with SasLite, the only way to
achieve that is to separate the Mustache
surface from the Beard surface, and divide
it into two pieces. So we'll do just that.
1.
2.
Return to Layout and open the Object
Properties panel if you've closed it.
Right-click on the line that says
SasLite Seen on Beard
, and choose
Copy
from the drop-down menu that
appears. Right-click again, and choose
Paste
. That will give you two identical
copies of the displacement.
In Modeler, select the polys that form
the mustache and hide the rest (tap the
<
=
> key). Then select the half on the
positive X axis, and give it a new sur-
face, say
lMustache
. Tap the <
"
>
(<
Shift
>+<
Quote
>) key to invert
the selection, and name the other side
rMustache
. (These correspond to the
model's right and left side, not yours.)
3.
Open one of them and change the Sur-
face Name(s) to
lMustache
. Leave
everything else the same, except for
the Comb X value. Make it pretty high.
(I used
80%
, and also lowered the
Comb Y value to
5%
.)
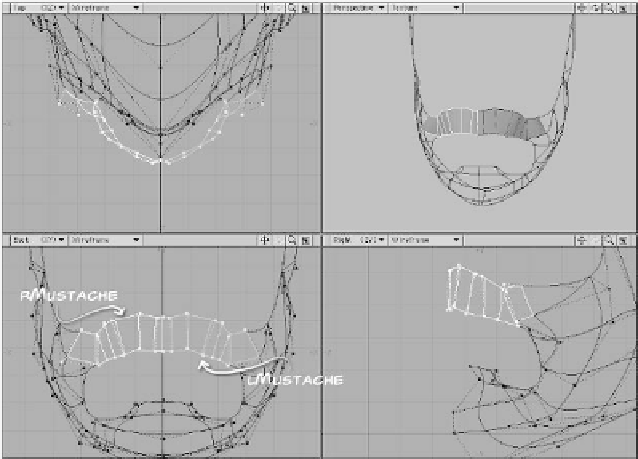
Figure 20-32: Divide the surface into three — the beard and two halves of the
mustache.