Graphics Reference
In-Depth Information
Now, we can start assigning materials to the 3D model by clicking on the Add
Material button and selecting a surface, as shown in the following screenshot:
When we put the mouse over the surface, the name of the material used on the
modeling package is displayed as shown in the previous screenshot. So, how can we
set a name for the material? The screenshot shows that the material used for the grass
is called
[Vegetation_Grass_Artifical]1
and this was defined in the modeling
package, which in this case was SketchUp.
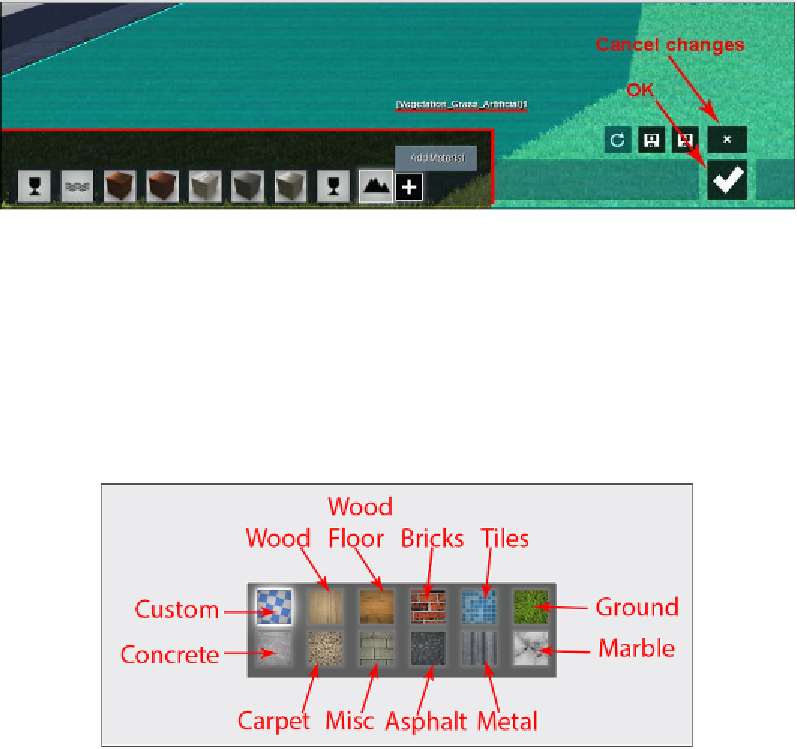
Once we click on the surface, Lumion opens the materials library where we
can discover all the materials organized in twelve tabs, as shown in the
following screenshot:
Now, it's your turn to start adding materials. When you are done, check if every
material was assigned correctly and save the materials by clicking on the
OK
button.
Naming materials
We still need to explore a few more points to fully master Lumion's materials.
Something that really helps is having the habit of taking some time and renaming
the materials prior to exporting the 3D model. This is extremely useful later when
we have to tweak a material or change it.