Information Technology Reference
In-Depth Information
4
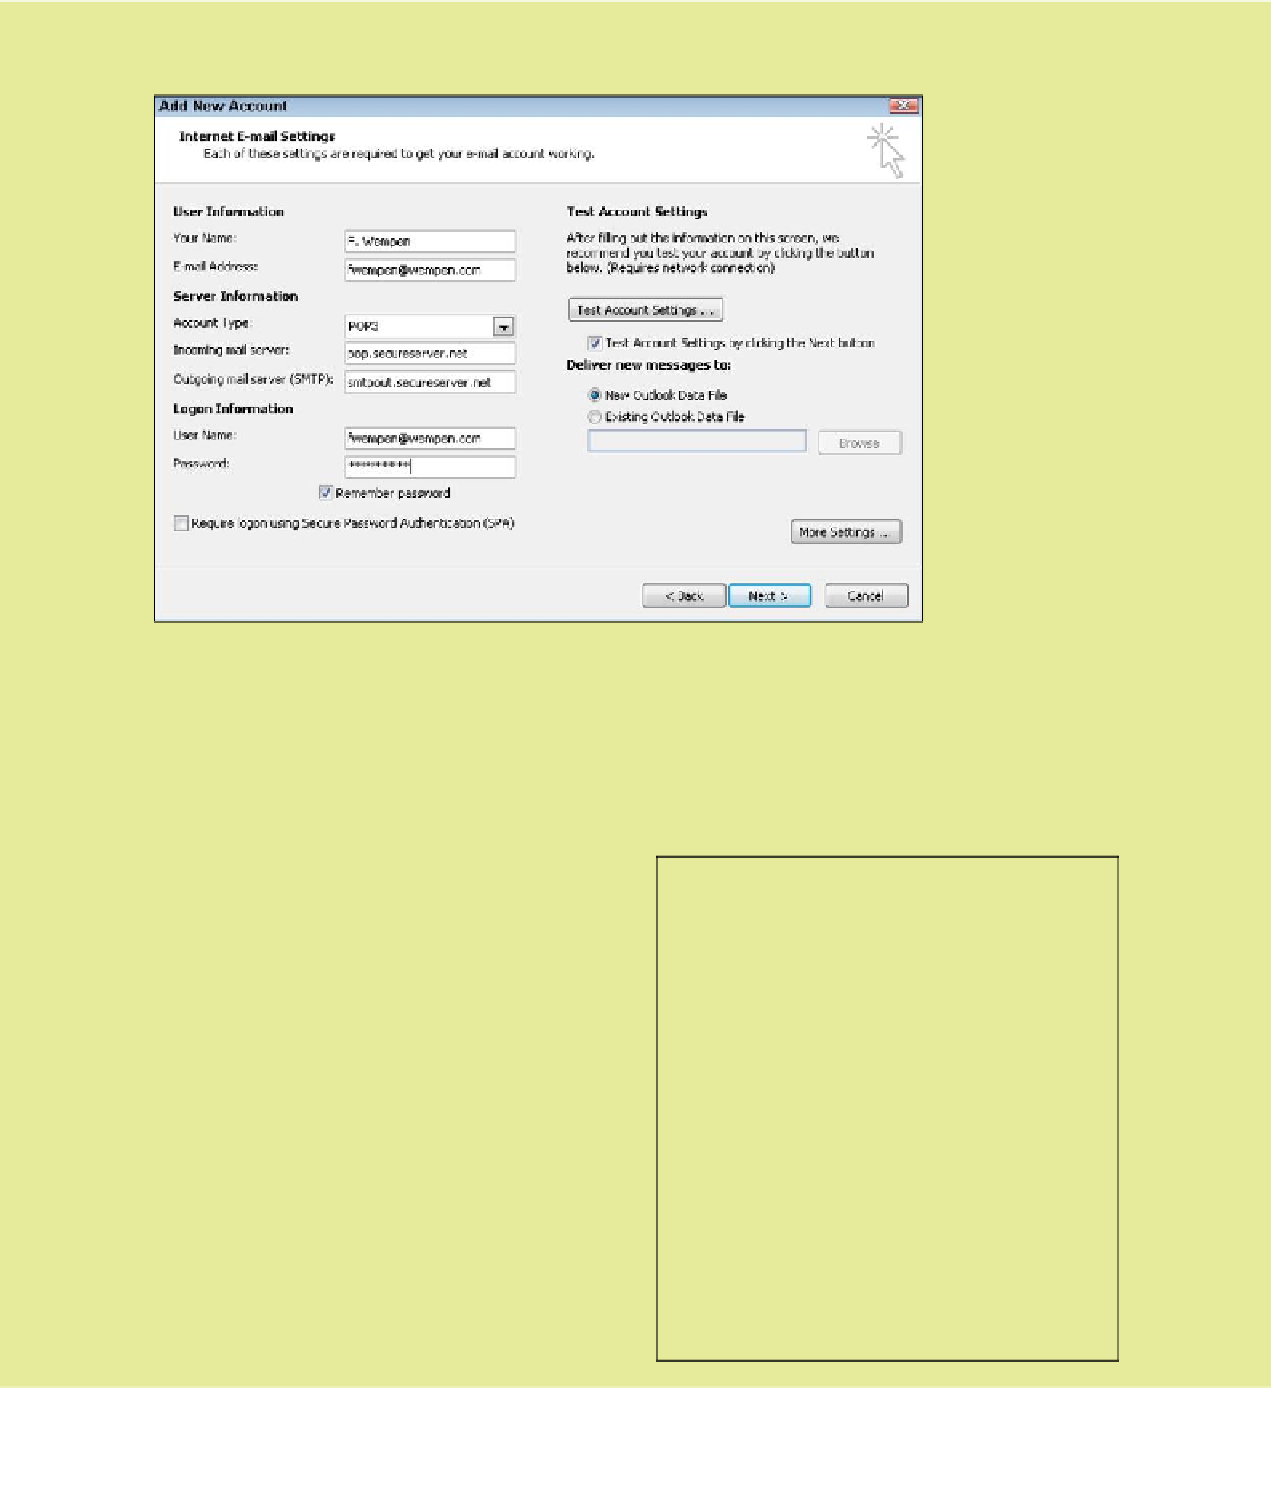
On the Internet Email Settings screen, fill in all the requested information. You will need to know the incoming and
outgoing mail server names; if you don't know these, get that information from your email provider.
Note:
By default Outlook creates a new data file for each email account you set up. If you want the new email account
to use an existing data file (for example, outlook.pst), select the Existing Outlook Data File option button and then
browse for the data file. This is an issue only for POP3 accounts, IMAP accounts store the mail on the server.
5
Click Next. Outlook tests the settings by sending and receiving a message. If both incoming and outgoing tests
show Completed, click Close and then click Finish; your settings are correct.
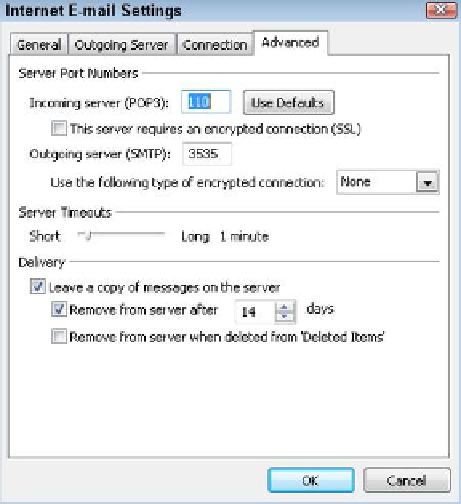
If, on the other hand, you see a message that Outlook cannot connect to either your incoming or outgoing mail
server, click Close and then click More Settings to open the Internet Email Settings dialog box.
6
Use the options in the dialog box to configure your
settings as directed by your email service provider. For
example, here are some common settings you might
need to change:
◾
On the Outgoing Server tab, select the My Outgoing
Server (SMTP) Requires Authentication check box.
◾
If your email provider has told you that you need
an SSL connection, on the Advanced tab, mark the
This Server Requires an Encrypted Connection (SSL)
check box.
◾
On the Advanced tab, change the port numbers for
the incoming and/or outgoing servers to the numbers
that your email service provider has specified.
7
Click OK, and then return to Step 5 to recheck your
settings.