Graphics Programs Reference
In-Depth Information
6. Move the timeslider to frame 26 and then enter
0
and
1
in the
Red
and
Yellow
spinners,
respectively, in the
User Data
area of the Attribute Manager. Next, add a keyframe.
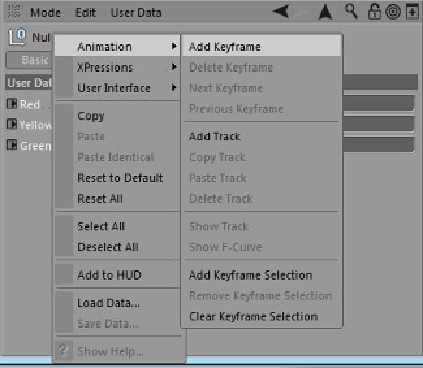
Figure 13-27
The shortcut menu displayed on right-clicking in the
User Data
area
7. Move the timeslider to frame 50 and add a keyframe by repeating the process mentioned
in step 4.
8. Move the timeslider to frame 51 and then enter
0
and
1
in the
Yellow
and
Green
spin-
ners, respectively, in the
User Data
area of the Attribute Manager. Next, add a key-
frame.
9. Choose the
Play Forwards
button from the Animation toolbar to preview the animation.
Saving and Rendering the Scene
After completing the tutorial, you will save the file using the steps given next.
1. Choose
File > Save As
from the main menu; the
Save File
dialog box is displayed. In
this dialog box, browse to the location
\Documents\c4dr16\c13
.
2. Enter
c13tut1
in the
File name
text box and then choose the
Save
button.
3. For rendering, refer to Tutorial 1 of Chapter 8.

Search WWH ::

Custom Search