Graphics Programs Reference
In-Depth Information
The best way to apply the Propagate Extents tool is with the 2D extents of grids. Why only
the 2D extents? Because changing the 3D extents affects the datum object throughout the
project, independent of any specific view. Let's examine this behavior with a quick exercise:
1.
Download and open the c02-Grids-Start.rvt ile from this topic's website, and then
activate the South elevation.
You will see three levels and four grids.
2.
Select grid 3 and click the 3D indicator at the bottom endpoint. Notice that the lock
symbol turns off automatically, allowing you to immediately adjust the graphic extents
of the grid.
3.
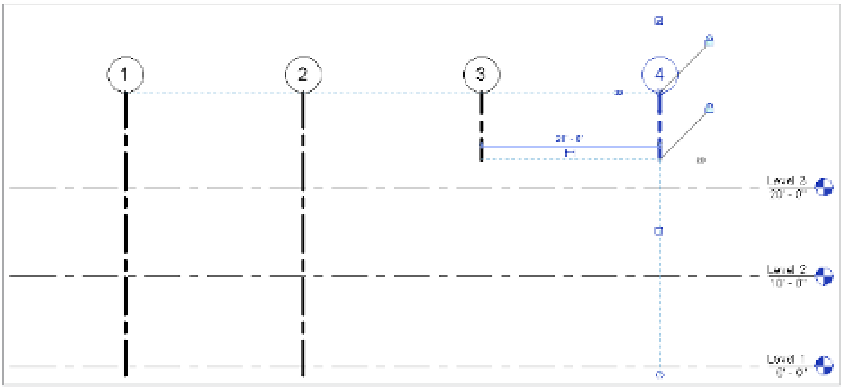
Drag the 2D extent of grid 3 up toward the top. Repeat this process for grid 4 so that the
result looks like the image shown in Figure 2.31.
Figure 2.31
Adjusting the 2d
extents of grids
The line weight of the grid lines has been increased for clarity.
Before you continue, open the Level 1 and Level 2 floor plans and observe that grids 3
and 4 are still visible. If you had adjusted the 3D extents of the grids in the South eleva-
tion view, those changes would already be reflected in the other views. We're using this
method because we want to maintain the 3D extents but modify the 2D extents only in
the South elevation view.
4.
Return to the South elevation view and select grids 3 and 4 while pressing the Ctrl key.
From the contextual tab in the ribbon, click the Propagate Extents button, and the dialog
box will appear as shown in Figure 2.32.