Game Development Reference
In-Depth Information
4.
When we applied the mapping to Kila's back, it was projected from the front, so in
effect the UVs are mirrored. Before you begin editing here, we need to flip all the
UVs. Select them all in the UV Texture Editor and go to Polygons > Flip UVs,
making sure you select Horizontal in the options.
5.
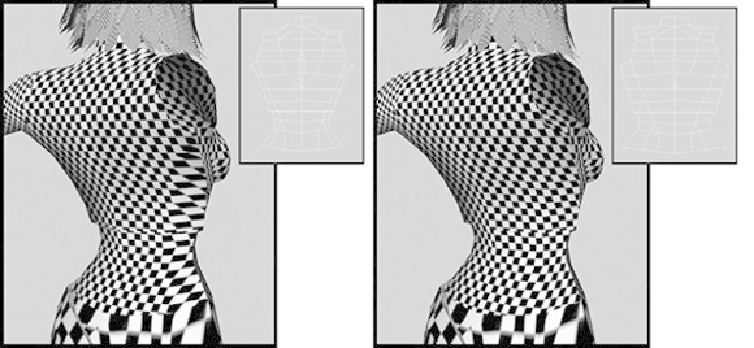
Now work on the back, removing most of the stretched areas of the texture until it
resembles that in
Figure 8.43
.
Try to remove as much as you can here, because
Kila will eventually have a tattoo; if the UVs are incorrect, the tattoo will stretch.
FIGURE 8.43
After flipping the UVs on her back, remove the stretched areas.
The UVs are now nicely laid out for her torso. Next up is the lower body, including waist
area, legs, and feet.
Lower Body UVs
To make it easier to generate the texture for Kila's sash and the jeans, we will keep the
waist and leg UVs together.
Waist and Legs
The UVs for the waist items and the legs will be edited exactly the same as you did her
torso. Let's start with the legs.
1.
As seen in
Figure 8.44
,
first apply planar mapping to the front and the back of the
entire lower body.