Game Development Reference
In-Depth Information
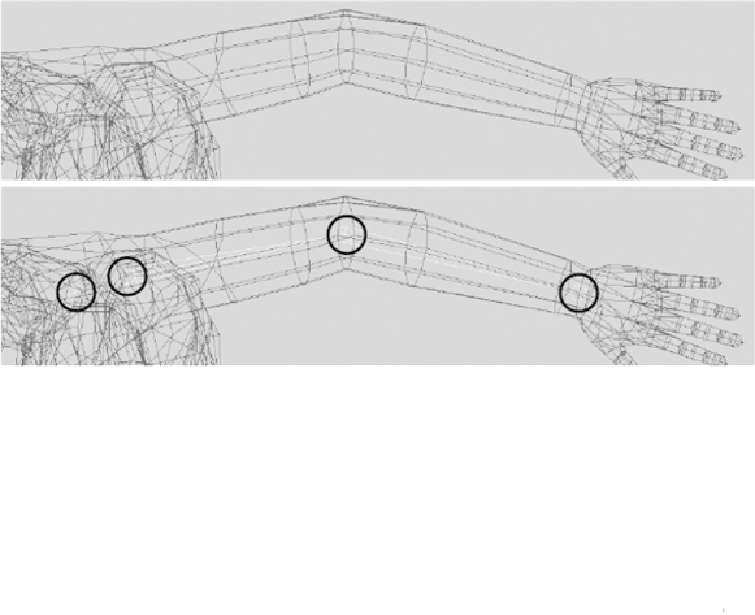
all. Press Enter to confirm the placement. Don't worry about renaming the joints;
they are only temporary.
FIGURE 6.2
Place four joints: before the shoulder, at the shoulder, at the elbow, and at
the wrist.
The joints are now correctly placed in the X and Z axes, so next let's check the Y
axis.
Tip
You can adjust the size at which joints are displayed by going to Display >
Joint Size.
4.
Switch to the front view (
Figure 6.3
,
left), and you'll see that the joints at this
stage all lie in the wrong place in the Y axis. You need to move them up so they
are positioned down the center of her arm. If you select and move the first joint
you placed, it will also move the rest, because the other joints are parented to this
one and thus inherit its movement. This will put the arm into the basic position for
us.