Civil Engineering Reference
In-Depth Information
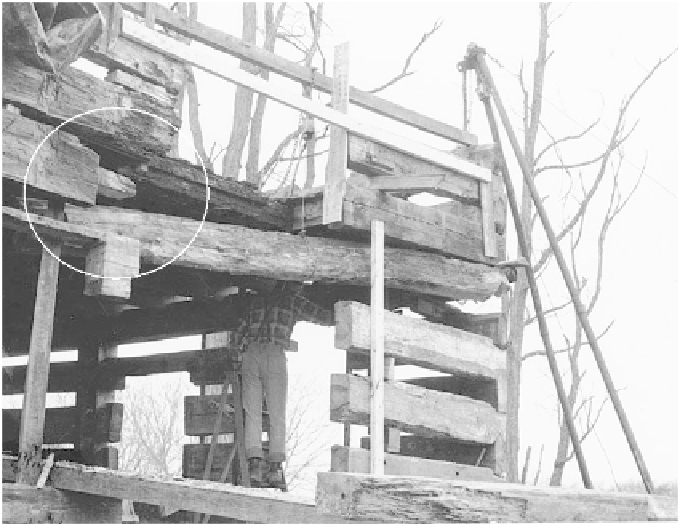
We raised the corner of a standing log pen
to splice in a replacement log. In this case
we used a finger-joint splice on the log being
raised with a ratchet hoist. The upper section
is lifted here with gin poles. If the roof is still
on, use heavier house jacks to lift the roof and
log walls. This is really not an exercise for the
amateur, but the result will make living in the
house more comfortable.
cut it back to sound heartwood, even though this will
mean a wider space to chink. Be especially careful to
cut back horizontally at the bottom of the logs, to leave
a corner that the chinking can be sloped up under so
rain can't get in.
Once the bad wood is removed, cut and nail in the
wire lath just as you do in new construction. It is
sometimes necessary to cut away the whole face of
the log to get to good wood — and sometimes, of
course, you never reach it. That's when you know it's
time to splice in a replacement. We've often had to
cover repaired chinking with siding when the neces-
sary surgery is just too ugly to bear.
In one case, we were called in to rechink a lakeside
cabin whose weathered face had felt the brunt for
many years. Not only had the solid chinking pulled
away from the logs, permitting water to enter and rot
the logs, but recent repairs had only aggravated the
problems. Styrofoam had been stuffed into the cracks
and cemented over. By the time we axed away rotted
wood and filled the chink crack with 12-inch-wide
chinking, the logs certainly looked sickly. We con-
ferred with the owners and the unanimous decision
was to clapboard that side of the house. We managed
to spare more log face on the inside, where it retained
the look of its log heritage. (For more about chinking,
turn to chapter 11.)
The finger-joint splice going together. The joint was glued with
construction adhesive and pegged in place.