Civil Engineering Reference
In-Depth Information
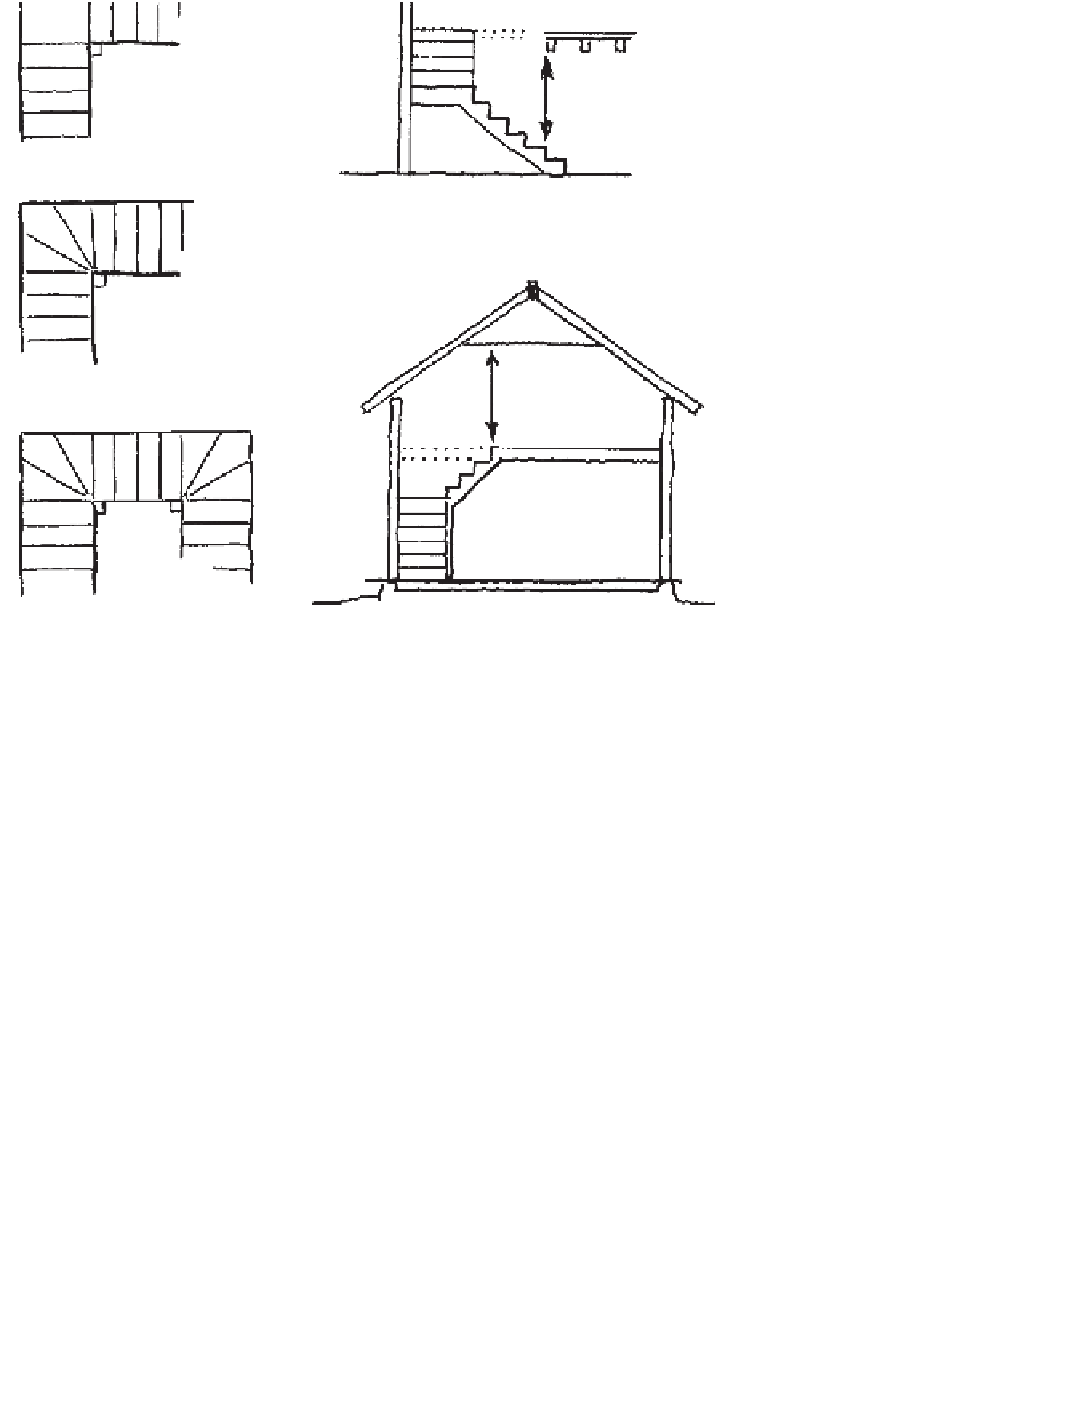
Stair Designs
For a one-and-a-half-story log house, the stairs
must turn away from the low roof (below). The
irregularities of log construction are a given —
head height, wall height, ceiling joist placement,
use of the upper floor space, etc. Meeting build-
ing codes to lay out a safe and comfortable
stairway will challenge any builder.
building code requirements for stairs in your area.
Codes are requiring reduced riser height, so more
steps may be needed for the same floor-to-floor
height. In our opinion, however, shorter steps are
safer, but narrower treads are not.
The problem here is the steep angle, because you
must have room to get around and onto the steps at
the bottom, off at the top, and up 11 or more in
between. If you plan to move furniture up or down,
prepare for a hernia. Codes require a minimum 9-inch
tread and maximum 8-inch riser, 36 inches wide. You
also need a 36-inch floor space (landing) at top and
bottom before you start the stairs.
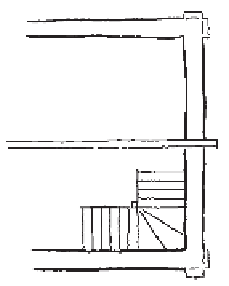
I build stairs with a sane pitch, made possible by
starting up the front or back wall to a landing or
winder well below head-bumping level, then up the
end wall. It uses up a lot of living space, true, but leaves
a logical place for a small coat closet downstairs. We
have a half-bath under ours. Upstairs it just takes a lot
of space. Try carrying a bathtub, wardrobe, chest of
drawers, or other bulky mass up or down and you'll
gladly sacrifice the footage. You'll do it more gladly as
the years advance.
When laying out stairs, remember that you'll have
one more riser than tread, because the upper floor is
the final tread. Divide the total inches from finished
floor to floor by the maximum 8-inch riser to start
with, then adjust. You'll usually have 11 or 12 steps in
the average cabin, maybe a little under 8 inches each.
Then it's a good idea to draw out the treads and risers
on the wall itself, including winding steps, if any. Don't
forget to allow for tread thickness in this layout.
Choose your own stair construction. A favorite has
always been simply treads nailed into angled cutouts
in the side framing stringers. You may prefer treads
laid onto nailer strips set inside the stringers with glue
and screws. Another variation is the treads end-nailed
through the framing, with risers for support.
Whenever I attach any horizontal member to a ver-
tical — as with a stair tread, joist end, or porch rail —
I like to mortise it. This was common before nails were
plentiful, and though time consuming, it is stronger.
So consider mortising each stair tread into the
stringer, with perhaps glue and pegs to help. Stairs
should not be fancy and out of place, but are a good
way to display careful craftsmanship.