Civil Engineering Reference
In-Depth Information
Probably the best flooring-ceiling combination is
two-inch-thick tongue-in-groove lumber, which is
quite expensive. A one-inch subfloor, with a second
layer over, is also acceptable. Tongue-in-groove lum-
ber helps each board support its neighbor in the spans.
If non-grooved lumber is used, you'll need closer joist
spacing, traditionally two feet.
For our Missouri house, we were able to obtain,
albeit at great expense, full 16-foot lengths of 2-inch
tongue-and-groove lumber, which spanned the entire
inside, leaving a neat inch extending into the chink-
ing space between logs at each end. A word of caution,
however: Try to lay this ceiling-floor in very dry
weather. Even kiln-dried lumber can shrink enough to
pull apart and leave cracks when winter heat is
applied. Now I order this shrink-wrapped in plastic at
the mill to keep it from swelling with moisture.
Again, don't lay this ceiling until you have the roof
on, unless you're one of those optimists who can safely
plan to have it on before the next rain. It would indeed
be easier to nail the ends of the boards to the side logs,
if nothing were above them, but you can slant the nails
fairly well. Or use a nailer strip against the logs for the
flooring ends.
The alternative was another pair of logs and more
ceiling height, which we really didn't want. We'd
already perched the cabin on 4-foot foundation piers,
and having only 16-foot-square outside dimensions, it
was already almost too tall. Besides, I knew I'd seen
houses built with the joists parallel to the ridgepole.
So we laid the ceiling joists parallel to the ridge.
And it wasn't until we put in the stairs that we saw why
this is a mistake. Stairs usually run along a wall, and
you bump the roof if you go up parallel to the ridge.
You could move to another wall and cut a couple of the
joists and support them from below, but that's messy.
In this case, we'd planned a disappearing ladder stair
anyway, so we put it in the middle of the room between
two joists and left everything as it was.
Stairs do take up a lot of your precious room, and
many old houses used narrow, steep stairs or ladders
nailed to the wall, or, later, disappearing stairs. With
the joists laid at right angles, disappearing stairs can
be placed neatly along the side wall opposite the fire-
place, like regular stairs. There is more about getting
upstairs in the chapter on lofts.
Above the joists, lay as many courses as you like to
help get headroom. But remember, the top course
must not be cut into to allow for windows. These logs
need their full strength, as you'll see when we talk
about roofs.
Loft Space
Now, assuming you want to make full use of your loft
space, you'll need to lay at least three more courses of
logs above the ceiling level. Notch out the next front-
and-back logs to fit over the joist ends and go ahead.
This may take awhile, because these notches must
match the end dovetails. Obviously, additional logs
above these joists just wreck their function as chords
in the rafter-truss game, but do it anyway. As I said,
we'll take care of that problem later.
Once, early in my career, I wanted a ceiling at a
height that meant running the joists parallel to the
ridge. There seemed no real reason not to do so. (The
joists had no connection to the roof.) My brother John
and I were building this cabin some distance from
home, and left the job for the weekend. We were both
convinced that the joists should be at right angles to
the ridge, but, because they would give no support to
the rafters, neither of us could reason why. We puzzled
over it all weekend.
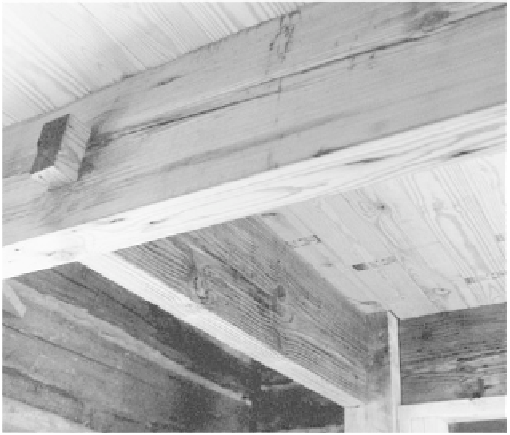
Overhead joist headed off with a mortise-and-tenon joint for a stair-
way. The upstairs flooring is two-inch tongue-in-groove to span the
wide joist spacing. Joists are recycled 3
≈
12 heart pine.