Graphics Programs Reference
In-Depth Information
Step Three:
Before you click the Edit button, there's
a checkbox called Stack with Original,
and I recommend leaving this on, because
what it does is puts this copy right beside
your original file, so it's easy to find later
when you're done editing in Photoshop
and return to Lightroom. Now, go ahead
and click the Edit button, and a copy of
your image, with the changes you made
in Lightroom (like cropping), opens in
Photoshop (as seen here). Also, to help
you distinguish this copy from the original,
Lightroom by default adds “Edit” to the
end of the filename, so you'll know at a
glance, once you bring the photo back
into Lightroom later (for RAW photos,
once you save the photo in Photoshop,
“Edit” will appear at the end of the filename,
as you see here, where I've saved the file).
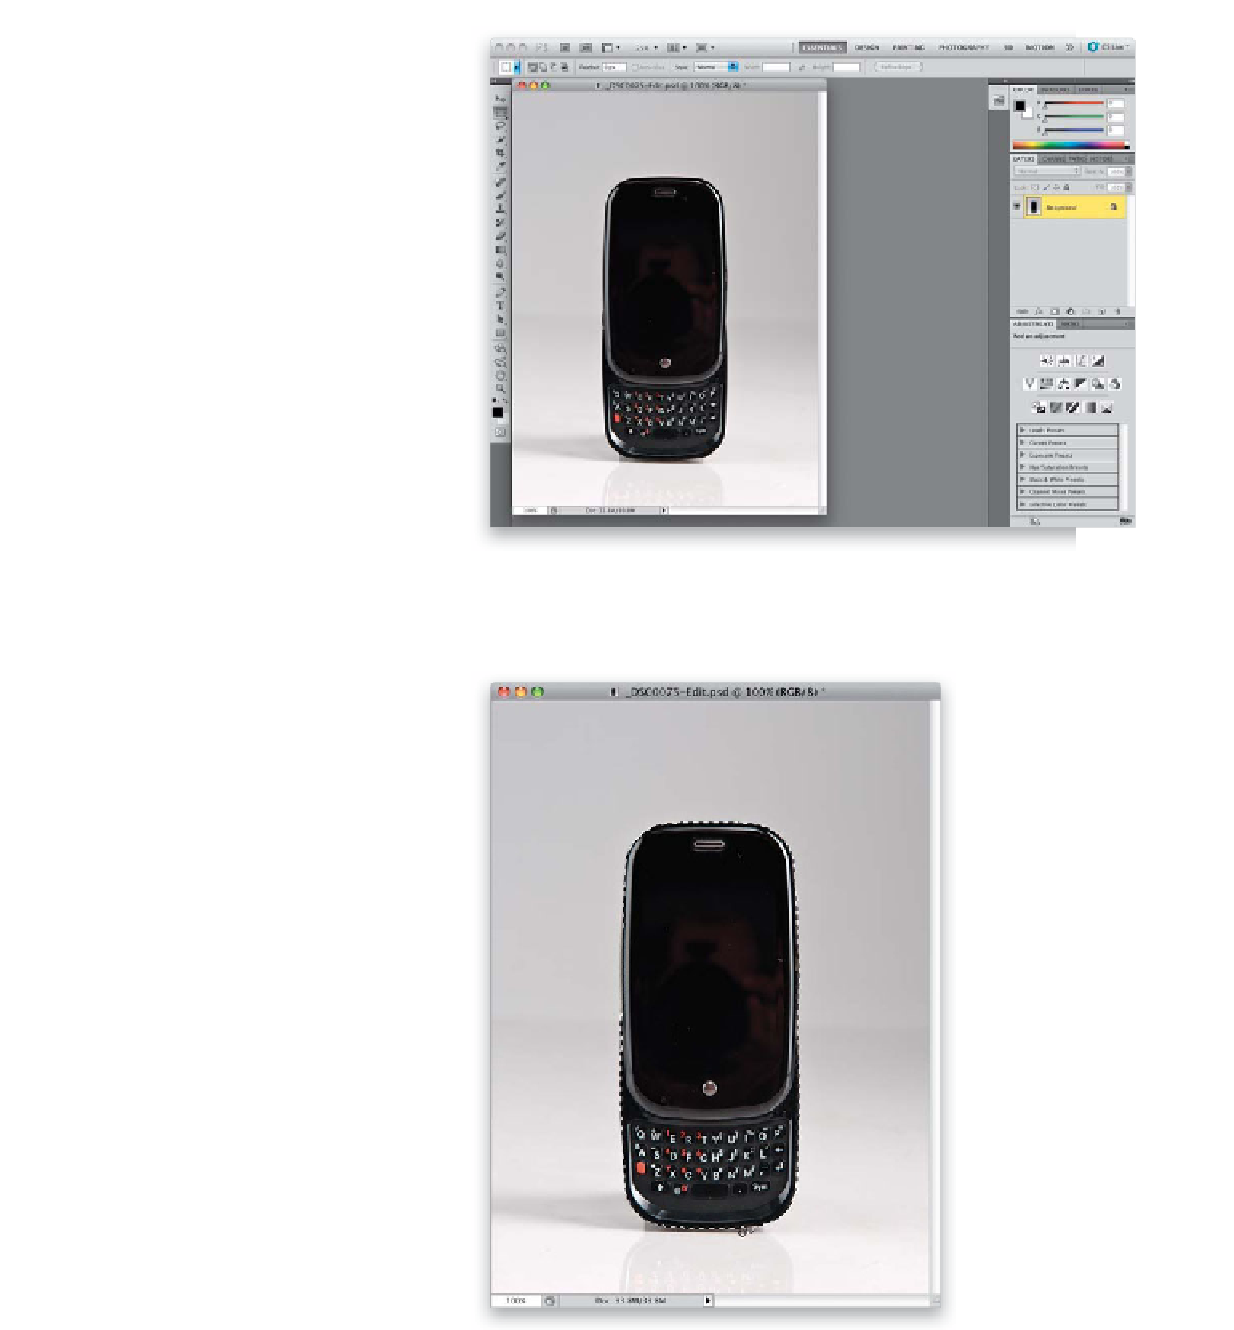
Step Four:
The first thing we have to do is get the
phone off the background onto its own
separate layer. Get the Quick Selection
tool
(W)
in Photoshop, and paint with
the tool over just the phone, and it selects
just the phone (I know—the Quick Select-
ion tool rocks!). Chances are it will select
the shadow just below the phone, as well,
but we only want the phone itself selected,
so press-and-hold the Option (PC: Alt) key
and paint over the shadow, and it becomes
deselected (if you look in the image shown
here, you can see my cursor removing the
shadow from the selection at the bottom-
right corner of the phone).