Graphics Programs Reference
In-Depth Information
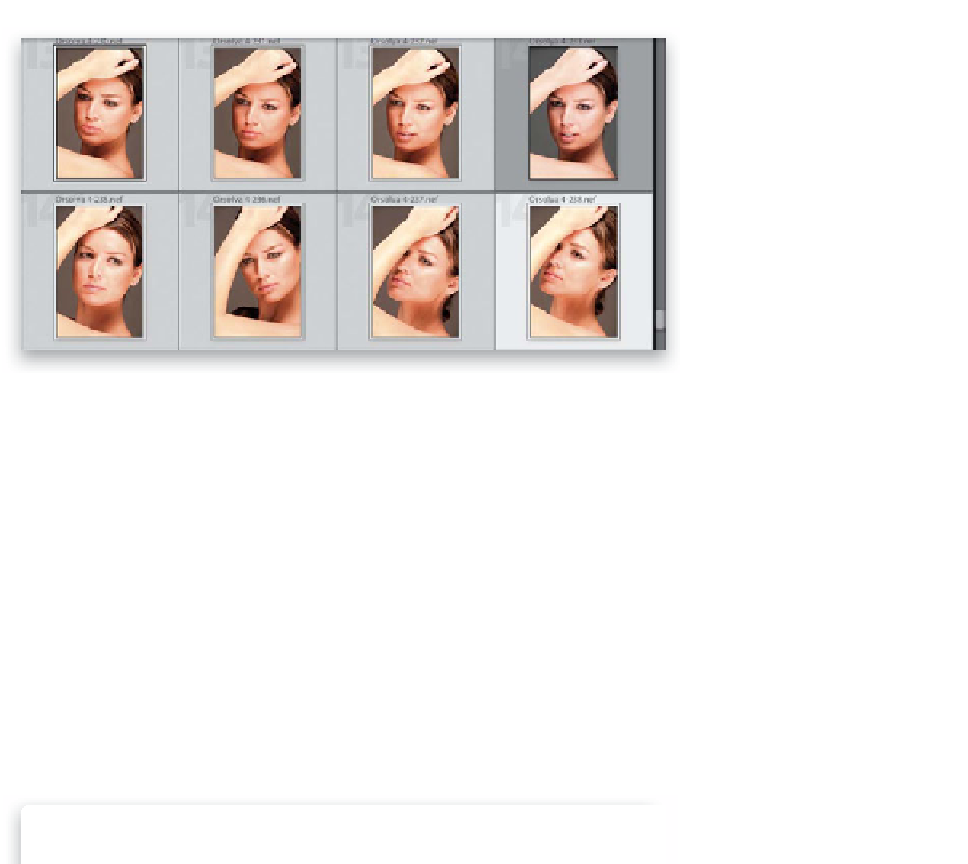
Step Three:
Now press
G
to return to the Grid view,
and select the photos you want to apply
this white balance change to (as shown
here). If you look in the top row of the grid
here, you can see that the fourth photo is
the one I corrected the white balance on,
so it's the only photo not selected. By the
way, if you want to apply the correction to
all your photos from the shoot at once, you
can just press
Command-A (PC: Ctrl-A)
to Select All your photos. It doesn't matter
if your original gets selected again—won't
hurt a thing.
TIP: Choosing Other Adjustments
Although here we're just copying-and-
pasting a White Balance setting, you can
use this function to copy-and-paste as
many attributes as you want. If I've made
a few edits in an area, I would just turn
on the checkbox for that entire area in the
Copy Settings dialog (in other words, I'd
turn on the Basic Tone checkbox for my
Basic panel edits, which automatically
turns on all the tonal edit checkboxes.
It just saves time).
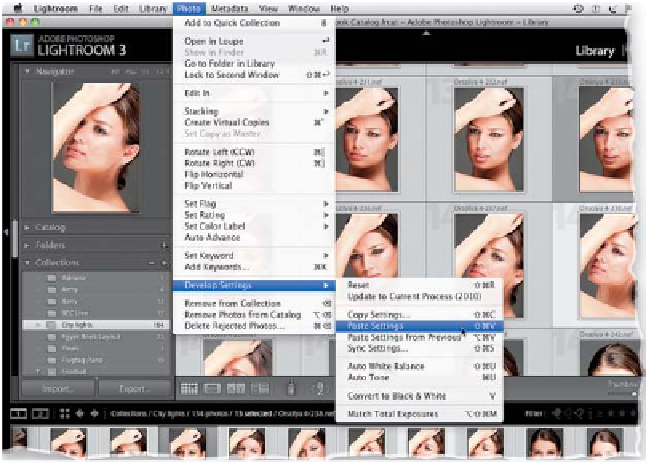
Step Four:
Now go under the Photo menu, under
Develop Settings, and choose
Paste
Settings
(as shown here), or use the
keyboard shortcut
Command-Shift-V
(PC: Ctrl-Shift-V)
, and the White Balance
setting you copied earlier will be applied
to all your selected photos (as seen here,
where the white balance has been cor-
rected on all those selected photos).
TIP: Fixing Just One or Two Photos
If I'm in the Develop module, fixing just one
or two photos, I fix the first photo, then in
the Filmstrip, I move to the other photo
I want to have the same edits and I click the
Previous button at the bottom of the right
side Panels area, and all the changes I made
to the previously selected photo are now
applied to that photo.