Graphics Programs Reference
In-Depth Information
This is where your workflow starts to get some legs, because once you've edited
one photo, you can apply those exact same edits to other photos. For example,
in that last project, we fixed the white balance for that one photo. But what if
you shot 260 photos during one shoot? Well, now you can make your adjustments
(edits) to one of those photos, then apply those same adjustments to as many of
the other photos as you'd like. Once you've selected which photos need those
adjustments, the rest is pretty much automated.
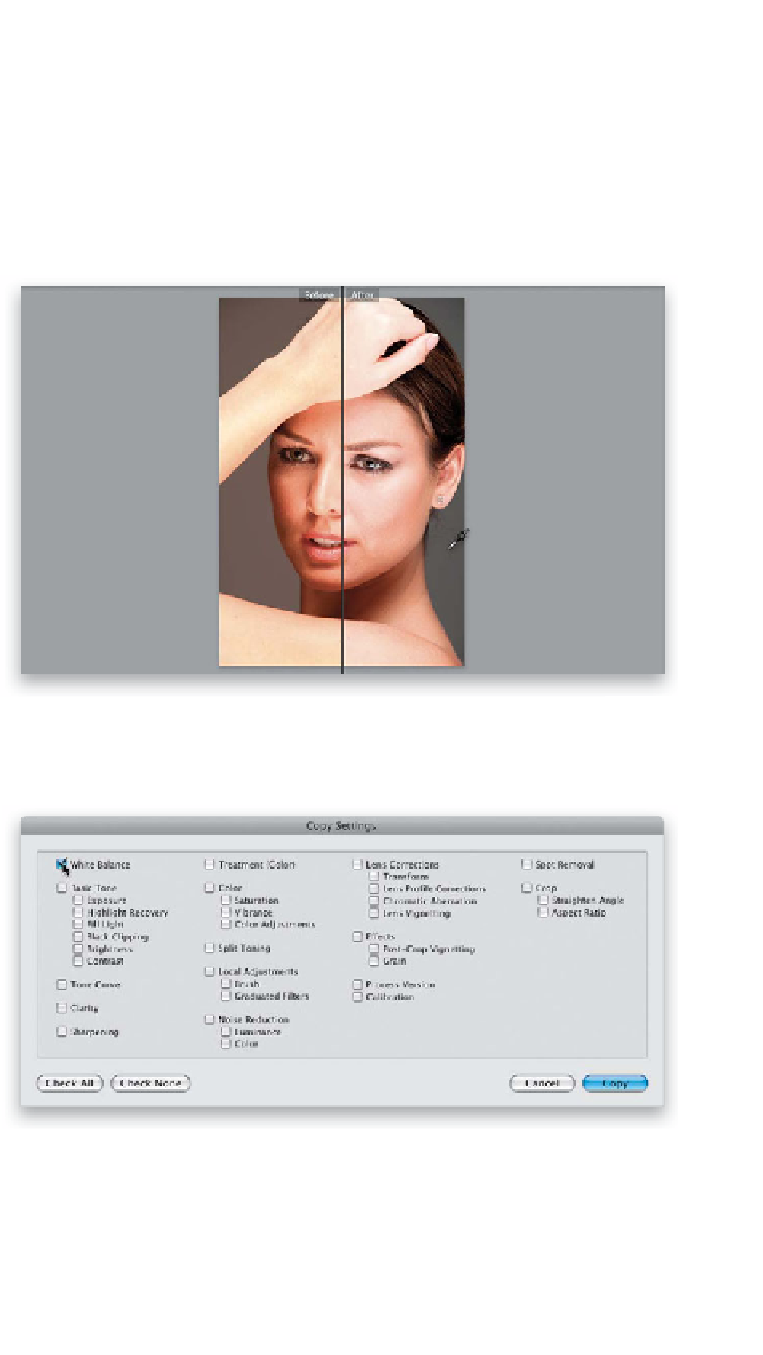
Step One:
We're going to finish up with our final
images from that beauty headshot shoot;
let's start by fixing the white balance. In the
Library module, click on a photo then press
W
, which is the Adjust White Balance short-
cut (it takes you to the Develop module
and gives you the White Balance Selector
tool), so all you have to do now is click on
something light gray in the photo (I pressed
Shift-Y
, so you could see a before/after split
view here). So, that's the first step—fix the
white balance, then press
D
to return to
Loupe view (just a reminder, you can down-
load this photo and follow along at
www
Step Two:
Now click the Copy button at the bottom
of the left side Panels area. This brings up
the Copy Settings dialog (shown here),
which lets you choose which settings you
want to copy from the photo you just
edited. By default, it wants to copy a bunch
of settings (several checkboxes are turned
on), but since we only want to copy the
white balance adjustment, click on the
Check None button at the bottom of the
dialog, then turn on just the checkbox for
White Balance, and click the Copy button.