Graphics Programs Reference
In-Depth Information
Step Five:
When you get to your studio, connect
your hard drive to your studio computer,
and copy that folder to the location where
you store all your photos (which should
be that My Lightroom Photos folder we
created in Chapter 1). Now, on your studio
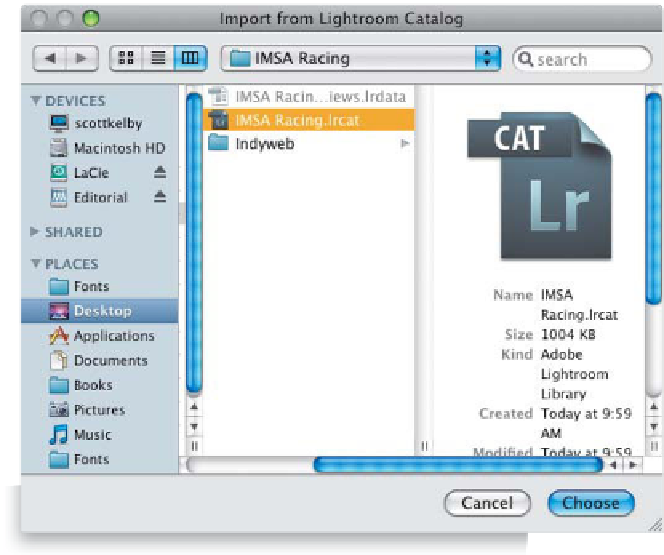
computer, go under Lightroom's File menu
and choose
Import from Catalog
to bring
up the dialog you see here. Navigate to
that folder you copied onto your studio
computer, and then inside that folder,
click on the file that ends with the file
extension LRCAT (as shown here), and
click the Choose button. By the way, if
you look at the capture shown here, you
can see that Lightroom created three items
inside this folder: (1) a file that includes the
previews, (2) the catalog file itself, and
(3) a folder with the actual photos.
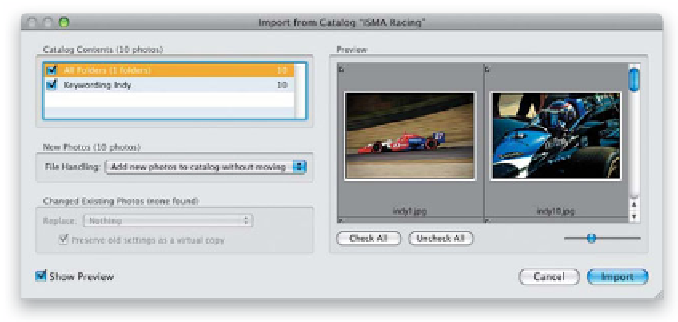
Step Six:
When you click the Choose button, it
brings up the Import from Catalog dialog
(seen here). Any photos in the Preview
section on the right that have a checkbox
turned on beside them will be imported
(I always leave all of these turned on). In
the New Photos section on the left is a File
Handling pop-up menu. Since we already
copied the photos into the proper folder
on our studio computer, I'm using the de-
fault setting which is Add New Photos to
Catalog Without Moving (as shown here),
but if you want to copy them directly from
your hard drive into a folder on your com-
puter, you could choose the Copy option
instead. There's a third option, but I have
no idea why at this point you'd choose to
not import the photos. Just click Import,
and these photos will appear as a folder,
with all the edits, keywords, etc., you
applied on your laptop.