Graphics Programs Reference
In-Depth Information
6.
The next icon is Crop View. This is a very important tool, so click it
now. You should see parts of your model around the corners disap-
pear! The model is not deleted, just cropped.
7.
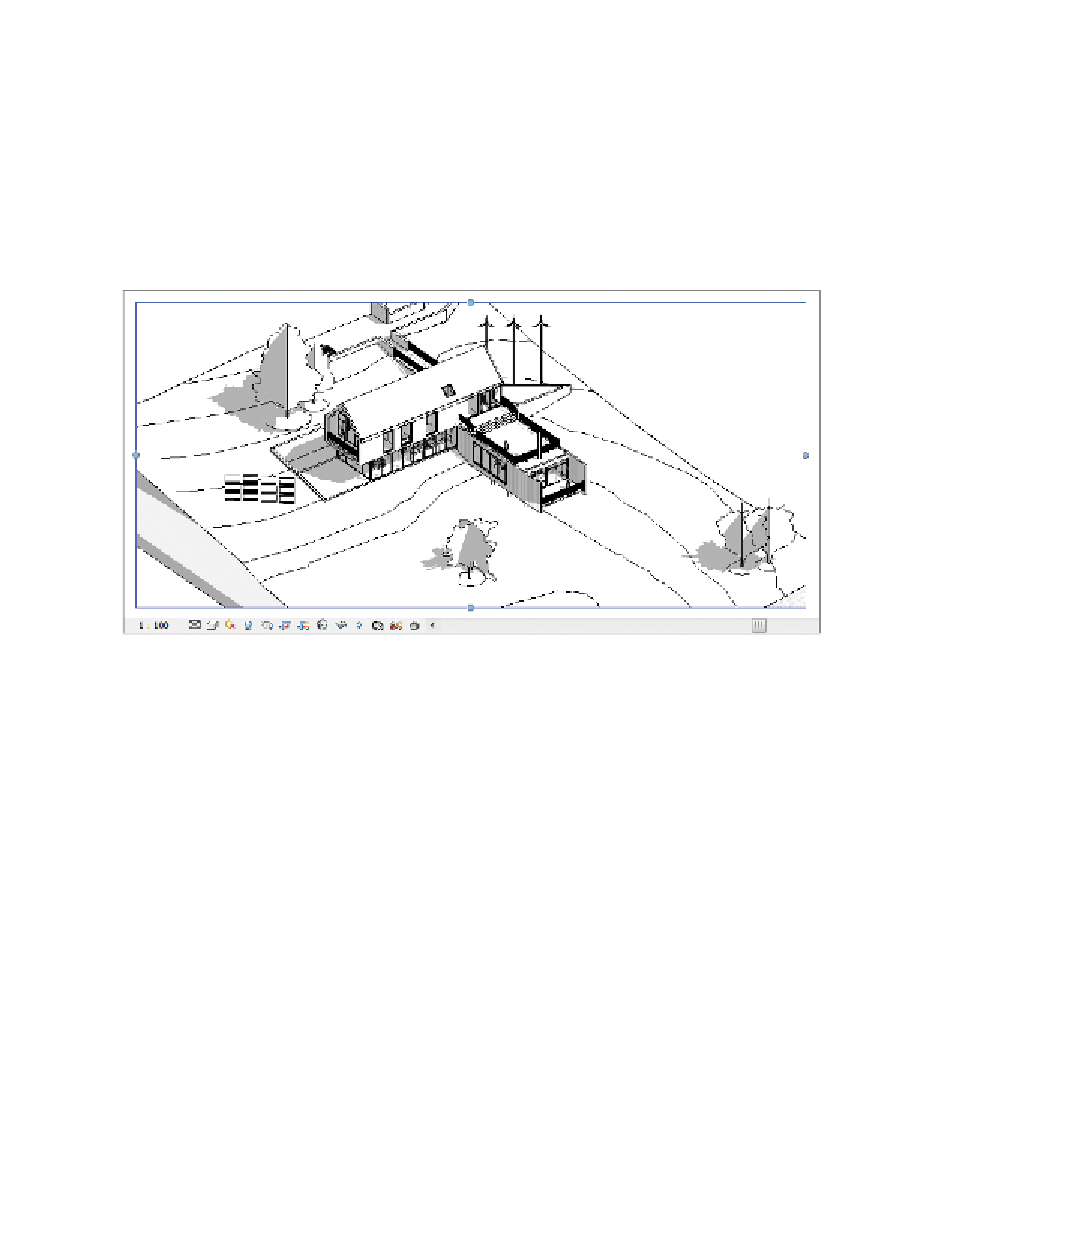
The next icon on the View Control Bar is Show Crop Region. Click
this to see the crop box for the view. Now that you see it, select it and
use the blue grips that appear to adjust your crop as you desire. See
Figure 1.5 for an example.
FIgUre 1.5
The Show Crop Region tool and the View Control Bar
The next icon is Lock 3D View. This option is available only in 3D
views. The command is helpful if you ever add text to a 3D view and
you don't want the viewpoint to change.
8.
The next icon looks like sunglasses. The Temporary Hide/Isolate tool
is very useful as your project grows more complex. Select the roof in
your project, and then click the sunglasses. Choose the option Isolate
Element from the dialog. Notice that all other elements in the view
are hidden so you can focus on the roof only. Click the sunglasses
again, and choose Reset Temporary Hide/Isolate. Now your view is
back to normal.
9.
The next icon in the View Control Bar is the light bulb, for Reveal
Hidden Elements mode. Click the light bulb and a magenta border
surrounds your view. Any element that is hidden, or turned off, will
also be displayed with magenta lines. This viewing mode will prove


Search WWH ::

Custom Search