Graphics Reference
In-Depth Information
Figure 13-14
)
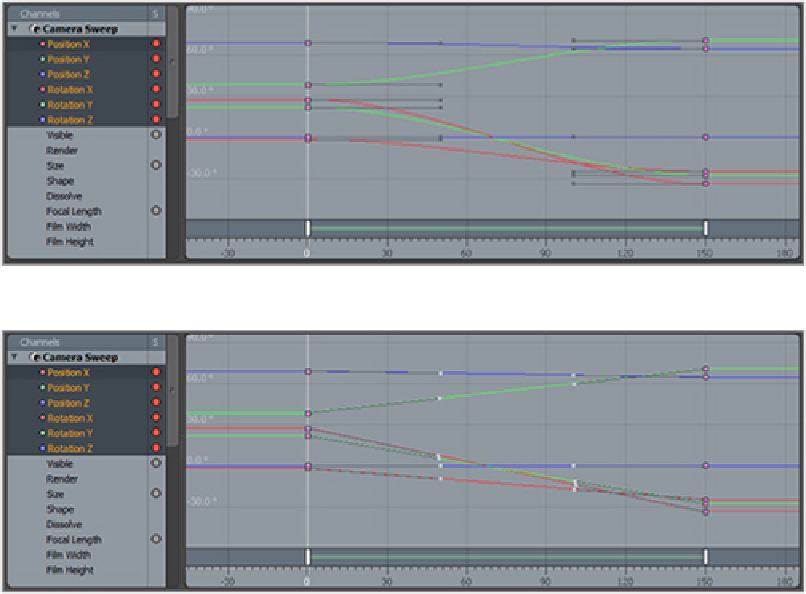
. Start by selecting all of the keys at frame 0 and setting them to Linear Out. Then set the keys
at frame 150 to Linear In. From here, select the individual attributes to simplify the graph by making only
the selected curve visible in the window. Now you will address the easing issue in two steps: removing it
completely and then adding back in just what is necessary to keep a clean camera move. Select all of the re-
maining keyframes. Then right-click anywhere in the Graph Editor and choose Linear. This will make every
aspect of the movement completely linear and have no easing at all, as shown in
Figure 13-15
.
From this simplified standpoint, it will be easier to fine-tune the motion. First you will adjust the motion
so that the camera does not get as close to the camera as it moves by. To do this, the Z position graph needs
to be altered so that it arcs toward the final position. Select the Position Z attribute in the Channels list of the
Graph Editor to show just the Z curve. Select both keyframes and choose Manual from the right-click menu.
When set to Manual, the curve tangents will become editable again. Drag the tangent for the first keyframe
so that it goes almost straight out from the keyframe (horizontal) and drag the tangent for the second key-
frame nearly upward. The resulting curve will be a half arc, as seen in
Figure 13-16
.
Figure 13-14:
The graph for the camera move with the middle keyframe removed
Figure 13-15:
Linear interpolation will be ideal for most of the keyframes in this animation.
Figure 13-16:
The proper curve adjustment for the Position Z channel