Applying Text-Related Features
The text for your Web page is displayed in the Document window. The next step in creating your Web page is to format this text. You use commands from the Property inspector and the Format menu on the Application bar to format the text.
Within Dreamweaver, you can format text before you type, or you can apply new formats after you type. If you have used word-processing software, you will find many of the Dreamweaver formatting commands similar to the commands within a word-processing program. At this point, your Web page contains only text, so the Property inspector displays attributes related to text.
To set block formatting, such as formatting a heading or an unordered list, position the insertion point in the line or paragraph and then format the text.
Text Headings
Just as in a word-processing document, designers use the heading structure in a Web page to set apart document or section titles. The six levels of HTML headings are Heading 1 through Heading 6. Heading 1 <h1> produces the largest text and Heading 6 <h6> the smallest. By default, browsers will display the six heading levels in the same font, with the point size decreasing as the importance of the heading decreases.
To Format Text with the Heading 1 Style
The following steps show how to format a heading.
Figure 1-47
1
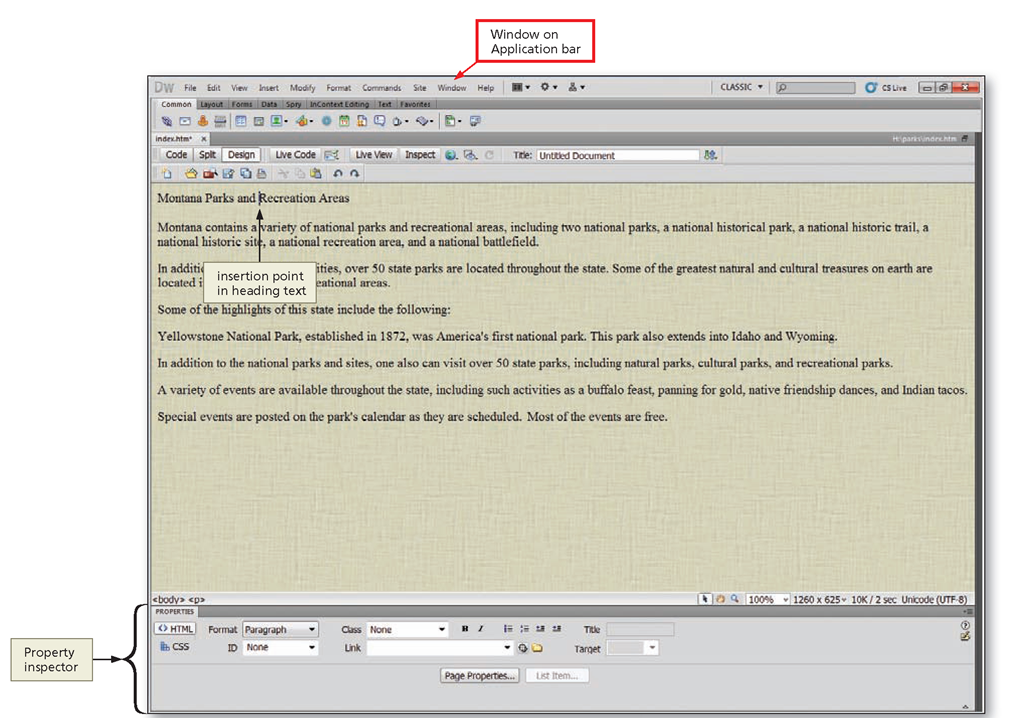
• Click Window on the Application bar, and then click Properties to display the Property inspector.
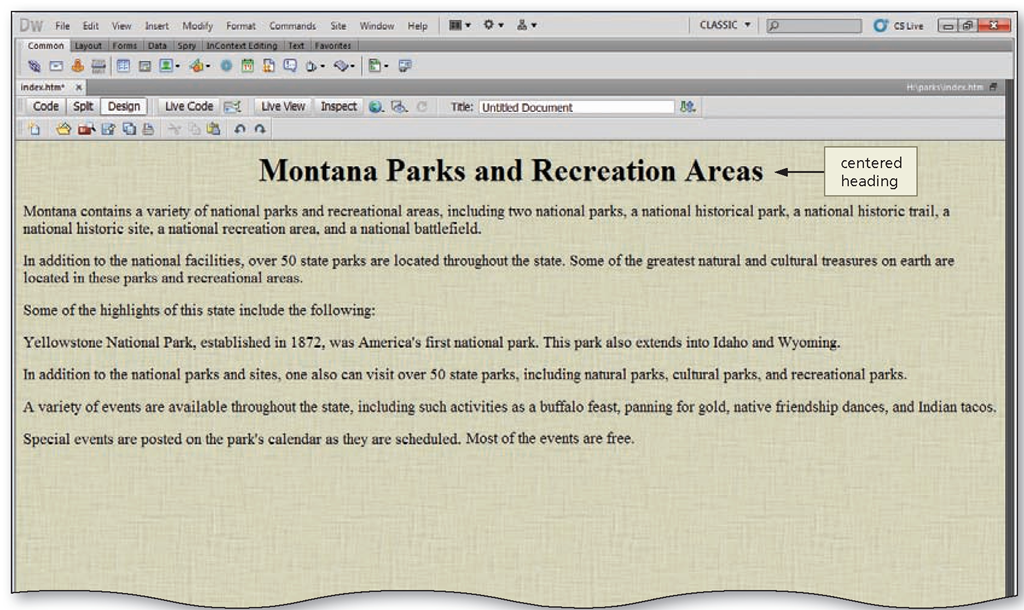
• If necessary, scroll up and then position the insertion point anywhere in the heading text, Montana Parks and Recreation Areas to prepare for applying the Heading 1 format to that text (Figure 1-47).
Figure 1-48
2
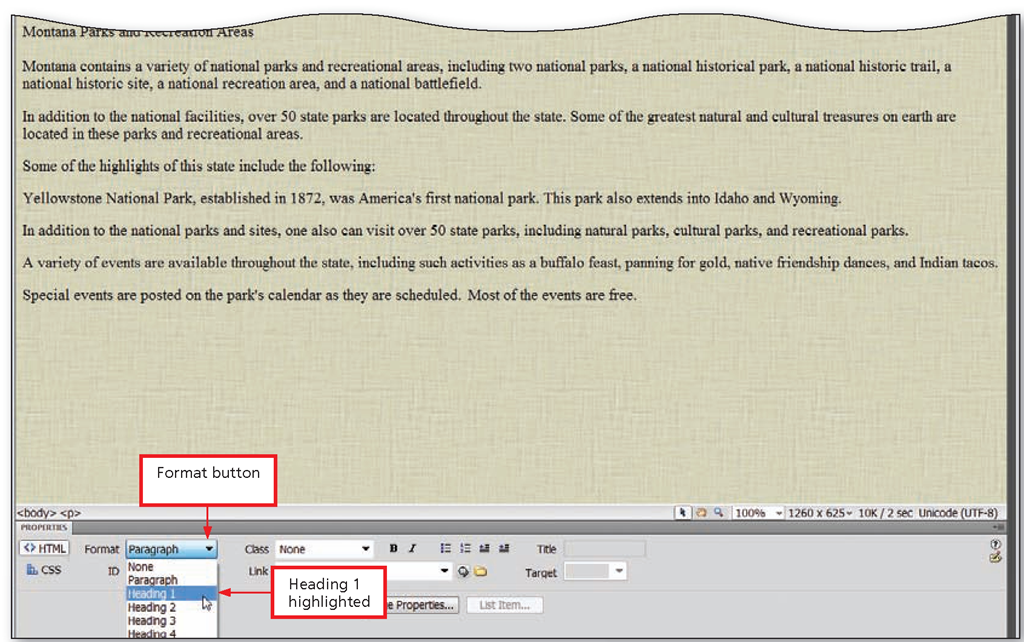
• Click the Format button in the Property inspector, and then point to Heading 1 to highlight the command (Figure 1-48).
Figure 1-49
3
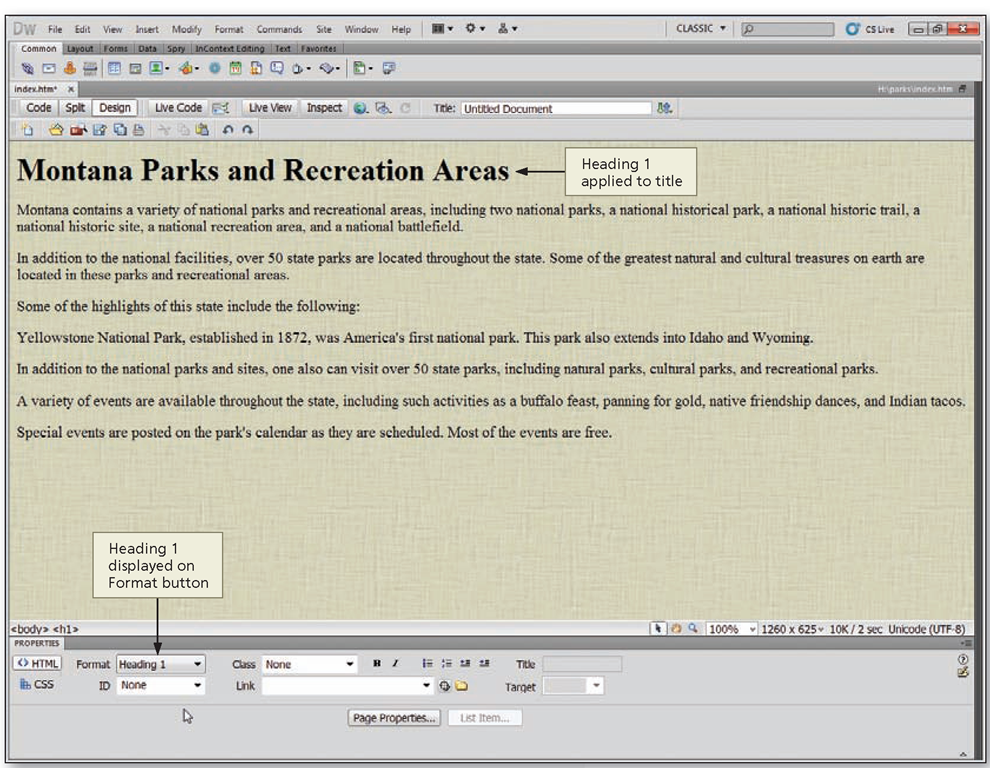
• Click Heading 1 to apply the Heading 1 style to the Montana Parks and Recreation Areas text (Figure 1-49).
Centering Text
Using the Center command on the Align submenu on the Format menu allows you to center text. This command is very similar to the Center command or button in a word-processing program. To center a single line or a paragraph, position the mouse pointer anywhere in the line or paragraph, and then click the Format menu on the Application bar, point to Align, and then click Center to center the text. You do not need to select a single line or single paragraph to center it. To center more than one paragraph at a time, however, you must select all paragraphs.
To Center the Web Page Heading
The following steps illustrate how to center a heading.
Figure 1-50
4
• If necessary, click anywhere in the Montana Parks and Recreation Areas heading to prepare for centering that text.
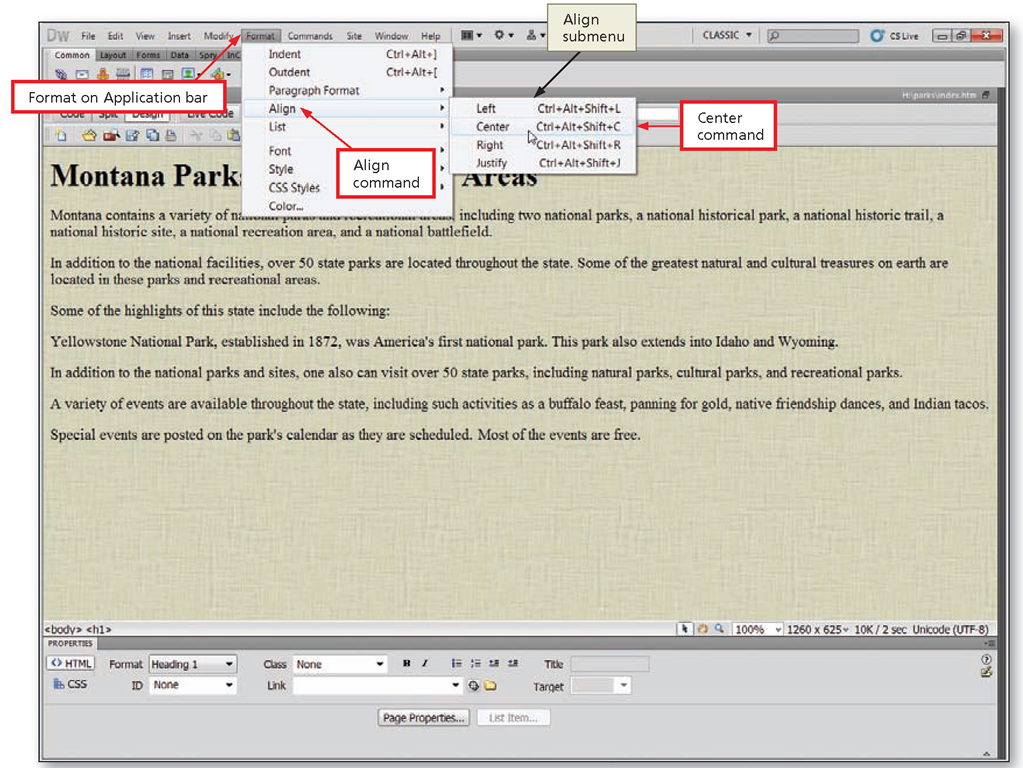
• Click Format on the Application bar, point to Align, and then point to Center to highlight that command (Figure 1-50).
Figure 1-51
5
• Click Center on the Align submenu to center the heading (Figure 1-51).
Types of Lists
One way to group and organize information is by using lists. Web pages can have three types of lists: ordered (numbered), unordered (bulleted), and definition. Ordered lists contain text preceded by numbered steps. Unordered lists contain text preceded by bullets (dots or other symbols) or image bullets. You use an unordered list if the items need not be listed in any particular order. Definition lists do not use leading characters such as bullet points or numbers. Glossaries and descriptions often use this type of list.
The Unordered List and Ordered List buttons are available in the Property inspector. You can access the Definition List command through the Application bar List command submenu. Through the List Properties dialog box, you can set the number style reset the count, or set the bullet style options for individual list items or for the entire list. To access the List Properties dialog box, click anywhere in the list, and then click the List Item button in the Property inspector.
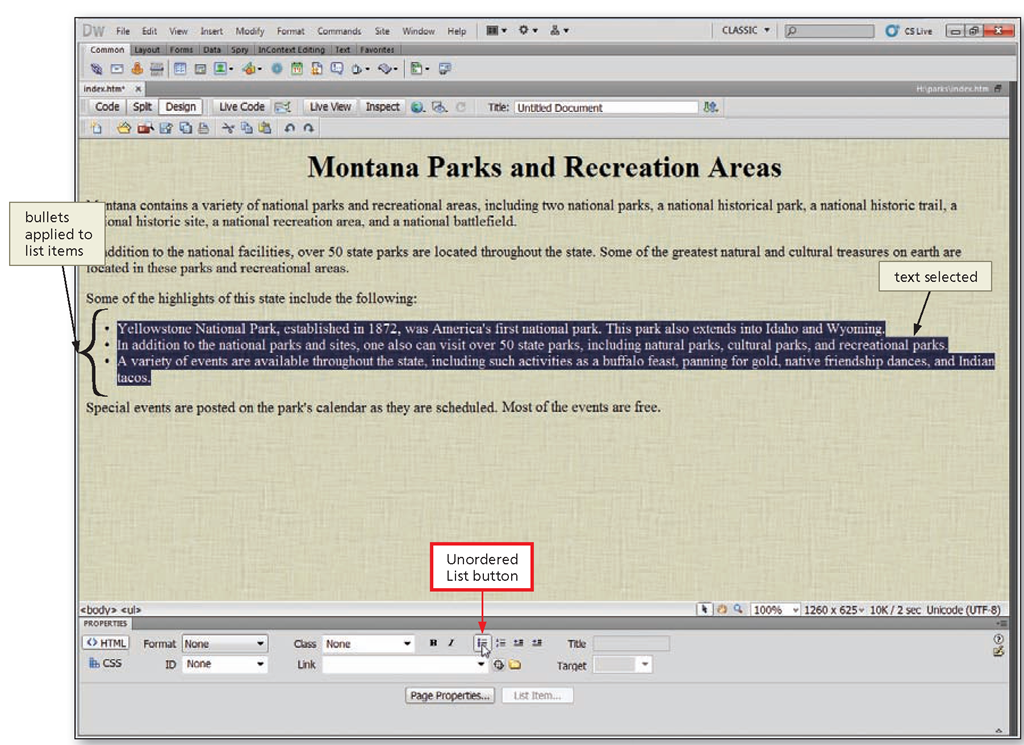
You can create a new list or you can create a list using existing text. When you select existing text and add bullets, the blank lines between the list items are deleted. Later in this topic, you add line breaks to reinsert a blank line between each list item.
To Create an Unordered List
The following steps show how to create an unordered (bulleted) list using existing text.
Figure 1-52
1
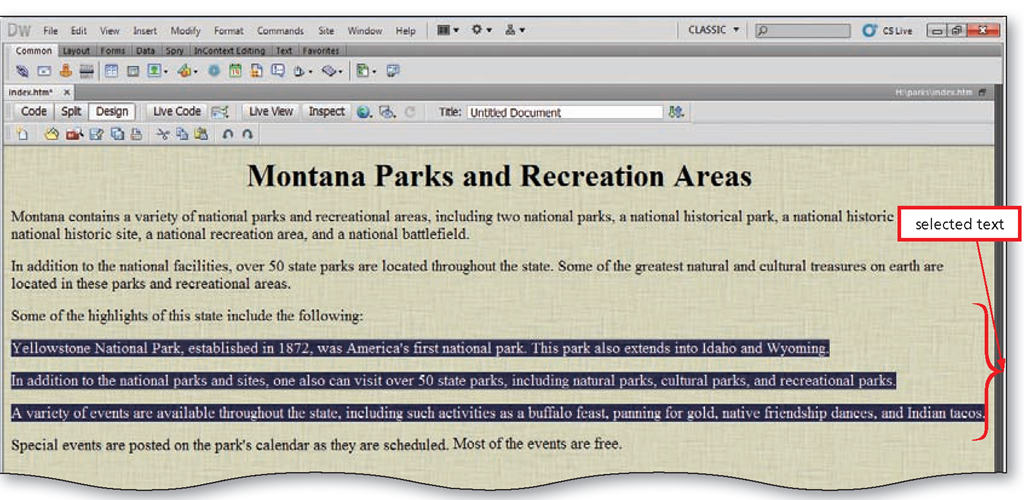
• Click to the left of the line that begins with "Yellowstone National Park".
• Drag to select the Yellowstone National Park paragraph and the next two paragraphs (Figure 1-52).
Figure 1-53
2
• In the Property inspector, click the Unordered List button to indent the text and add a bullet to each line (Figure 1-53).
Q&A
How do I start a list with a different number or letter?
In the Document window, click the list item you want to change, click the Format menu, point to List, and then click Properties. In the List Properties dialog box, select the options you want to define.
