Drawing Text
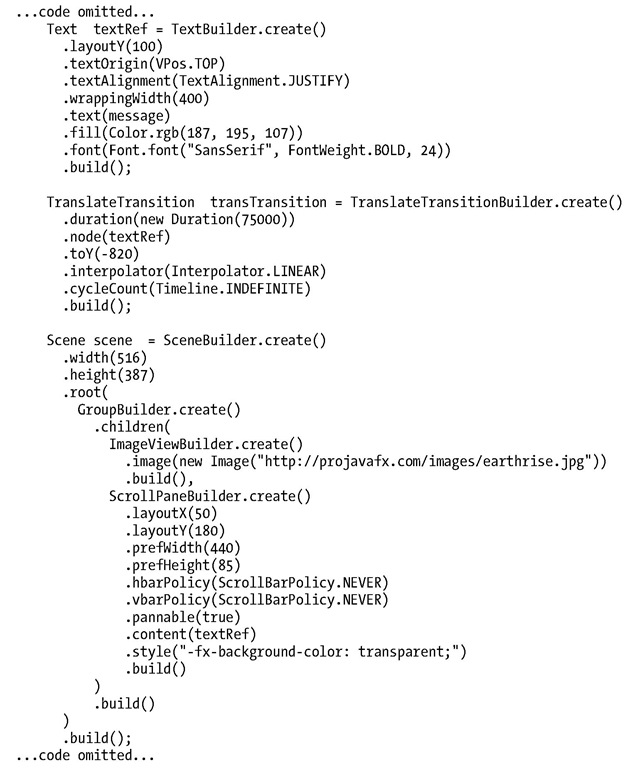
In the previous snippet, notice that several variables are available in the Text class. This particular example is a little more complicated than the normal use of the Text class. Let’s first look at a typical case, shown in the following snippet, in which you simply want to draw a string of text characters somewhere in the scene.
This snippet, borrowed from the Audio Configuration example in Figure 1-7 and Listing 1-3 later in this topic, draws the graphical Text string "Audio Configuration" in a bold Sans Serif font. The font size is 20, and the color of the text is white.
Referring again to the JavaFX API documentation, notice that the VPos enum (in the javafx.geometry package) has fields that serve as constants, for example, BASELINE, BOTTOM, and TOP. These control the origin of the text with respect to vertical locations on the displayed Text:
• The TOP origin, as we’re using it in the previous code snippet, places the top of the text (including ascenders) at the layoutY position, relative to the co-ordinate space in which the Text is located.
• The BOTTOM origin would place the bottom of the text, including descenders (located in a lowercase "g", for example) at the layoutY position.
• The BASELINE origin would place the baseline of the text (excluding descenders) at the layoutY position. This is the default value for the textOrigin property of a Text instance.
While you’re looking at the javafx.scene.text package in the API documentation, take a look at the font function of the Font class, which is used in the previous snippet to define the font family, weight, and size of the Text.
Turning back again to the Hello Earthrise example in Listing 1-1, we’re using some additional properties of the Text class that enable it to flow from one line to the next:
• The wrappingWidth property enables you to specify at what number of pixels the text will wrap.
• The textAlignment property enables you to control how the text will be justified. In our example, TextAlignment.JUSTIFY aligns the text on both the left and right sides, expanding the space between words to achieve that.
The text that we’re displaying is sufficiently long to wrap and be drawn on the Earth, so we need to define a rectangular region outside of which that text can’t be seen.
Clipping Graphical Areas
To define a clipping area, we assign a Node subclass to the clip property that defines the clipping shape, in this case a Rectangle that is 430 pixels wide and 85 pixels high. In addition to keeping the Text from covering the moon, when the Text scrolls up as a result of animation the clipping area keeps the Text from covering the earth.
Animating the Text to Make It Scroll Up
When the HelloEarthriseMain program is invoked, the Text begins scrolling up slowly. To achieve this animation, we’re using the TranslateTransition class located in the javafx.animation package, as shown in the following snippet from Listing 1-1.
The javafx.animation package contains convenience classes for animating nodes. This TranslateTransition instance (created by the TranslateTransitionBuilder class) translates the Text node referenced by the textRef variable from its original Y position of 100 pixels to a Y position of -820 pixels, over a duration of 75 seconds. The Interpolator.LINEAR constant is assigned to the interpolator property, which causes the animation to proceed in a linear fashion. A look at the API docs for the Interpolator class in the javafx.animation package reveals that there are other forms of interpolation available, one of which is EASE_OUT, which slows down the animation toward the end of the specified duration.
■ Note Interpolation in this context is the process of calculating the value at any point in time, given a beginning value, an ending value, and a duration.
The last line in the previous snippet begins executing the play method of the TranslateTransition instance created earlier in the program. This makes the Text begin scrolling upward. Because of the value assigned to the cycleCount variable, this transition will repeat indefinitely.
Now that you’ve compiled and run this example using the command-line tools and we’ve walked through the code together, it is time to begin using the NetBeans IDE with the JavaFX plug-in to make the development and deployment process faster and easier.
Building and Running the Program with NetBeans
Assuming that you’ve downloaded and extracted the source code for this topic into a directory, follow the directions in this exercise to build and run the Hello Earthrise program in NetBeans with the JavaFX plug-in. If you haven’t yet downloaded the JavaFX SDK and the JavaFX plug-in for NetBeans, please do so from Oracle’s JavaFX site listed in the Resources section at the end of this topic.
BUILDING AND RUNNING HELLO EARTHRISE WITH NETBEANS
To build and run the Hello Earthrise program, perform the following steps.
1. Start up NetBeans containing the JavaFX 2.0 plug-in.
2. Choose File > New Project from the menu bar.
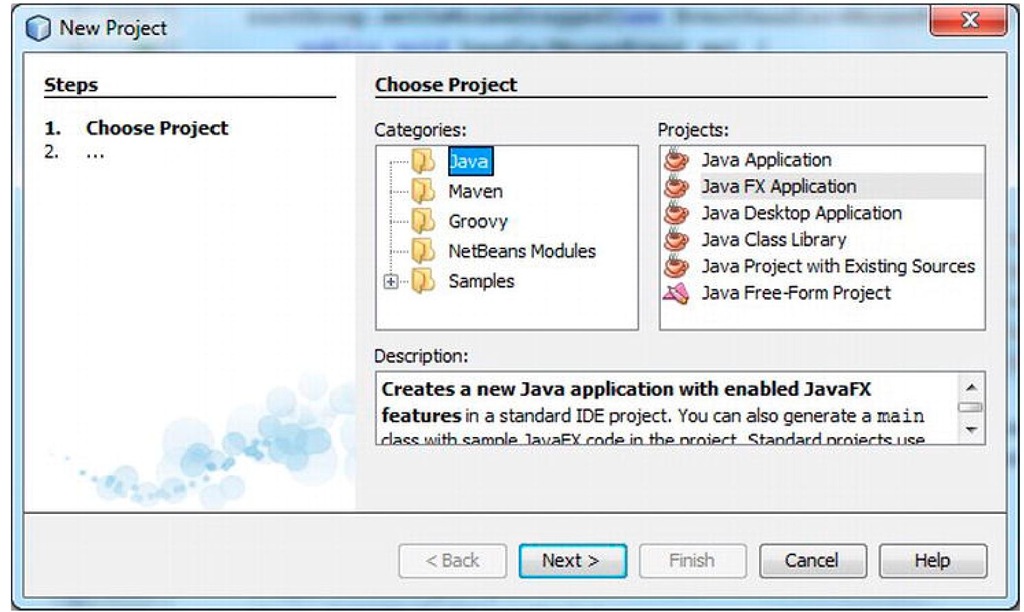
The first window of the New Project Wizard will appear:
3. Choose Java in the Categories pane and JavaFX Application in the Projects pane, and click the Next button. The next page in the New Project Wizard should appear:
4. On this screen, type the project name (we used HelloEarthRise) and click the Browse button.
5. On the Select Project Location screen, navigate to the directory in which you’d like to create this project (we used C:\MyJavaFX), and click the Open button.
6. Select the Create Main Class check box, and change the supplied package/class name to: projavafx.helloearthrise.ui.HelloEarthRiseMain
7. Select the Set as Main Project check box.
8. Click the Finish button. The HelloEarthrise project with a default main class created by the JavaFX Plugin for NetBeans should now be created. If you’d like to run this default program, right-click on the HelloEarthRise project in the Projects pane and select Run Project from the context menu.
9. Enter the code from Listing 1-1 above into the HelloEarthRiseMain.java code window.
10. Right-click on the HelloEarthrise project in the Projects pane and select Run Project from the context menu.
The HelloEarthRise program should begin executing, as you saw in Figure 1-4 earlier in the topic.
At this point, you’ve built and run the "Hello Earthrise" program application, both from the command-line and using NetBeans. Before leaving this example, we show you another way to achieve the scrolling Text node. There is a class in the javafx.scene.control package named ScrollPane whose purpose is to provide a scrollable view of a node that is typically larger than the view. In addition, the user can drag the node being viewed within the scrollable area. Figure 1-6 shows the Hello Earthrise program after being modified to use the ScrollPane control.
Figure 1-6. Using the ScrollPane control to provide a scrollable view of the Text node
Notice that the move cursor is visible, signifying that the user can drag the node around the clipped area. Note that the screenshot in Figure 1-6 is of the program running on Windows, and the move cursor has a different appearance on other platforms. Listing 1-2 contains the code for this example, named HelloScrollPaneMain.java.
Listing 1-2. The HelloScrollPaneMain.java Program
Now that you’ve learned some of the basics of JavaFX application development, let’s examine another JavaFX example application to help you learn more JavaFX Script concepts and constructs.
![tmpA-14_thumb[2] tmpA-14_thumb[2]](http://what-when-how.com/wp-content/uploads/2012/03/tmpA14_thumb2_thumb.jpg)
![tmpA-15_thumb[2] tmpA-15_thumb[2]](http://what-when-how.com/wp-content/uploads/2012/03/tmpA15_thumb2_thumb.jpg)


