Registration
Registration refers to when one object touches another in the scene. For example, when the 2D character Hogarth climbs into the 3D robot’s hand in the Iron Giant, where they contact is the registration line. In the past, having a 3D object contact a 2D object has been a large registration issue that was nearly impossible to overcome. 3D objects had to be printed out and pegged onto animation paper. This process is error prone the moment the printer spits out the first page. The printer itself does not print a well-registered image; the pegging process cannot be perfect enough. The 2D animator must register 2D art to this wobbly image. This method was used on Mulan, Lilo and Stitch, and countless other animated films. With dedication to detail, it is possible to produce well-registered images this way, although this method is very difficult.
Technology has advanced, and now that Wacom tablets, Cintiq tablets, and paperless animation have arrived, the printing pipeline for registration is no longer necessary (unless you have budgetary issues). However, even with the introduction of the Cintiq and Wacom tablets, registration is still an issue that can belittle the 2D/3D compositing efforts. If the artists are careless in regard to the registration lines (in other words, if the artists have sloppy draftsmanship), all the technology in the world cannot save the shot.
Each combination of elements requires a different pipeline to obtain the best registration. Depending on which element “leads the movement" in each shot, the 3D element will have to be drawn first or the 2D element will have to be drawn first. In the coming topics as we cover the common combinations of the media, we will also highlight the pipeline needed for proper registration.
FIGURE 1.16 Example of 2D character registering with 3D character.
Frame Rate and Image Format
Frame rate and image format seem like small issues, and they are often overlooked in small studios or on student films. When combining different media, especially across multiple software packages, it is extremely important to agree upon the frame rate that will be used and in what format the images will go through the pipeline. For example, if a 2D character is drawn and pencil tests are done at 24 frames per second, the animation is approved and a reference avi file is made. Then that animation is brought into a 3D software package for the 3D animator to create the octopus arms that are to attach to the 2D character. The 3D animator should, obviously, use the same frame rate as the 2D animator. Is the avi file that the animator is referencing actually 24 frames per second? Did the 3D animator remember to set playback settings to 24 fps, or are the settings on 30 fps? Pipeline tests need to check that image formats maintain constant frame rate and image size throughout the production. All of the topics we cover will help to make it unnecessary to redo scenes because the animation did not match properly.
Timing
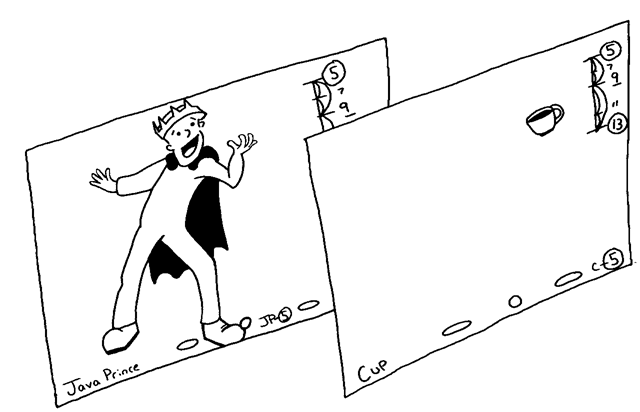
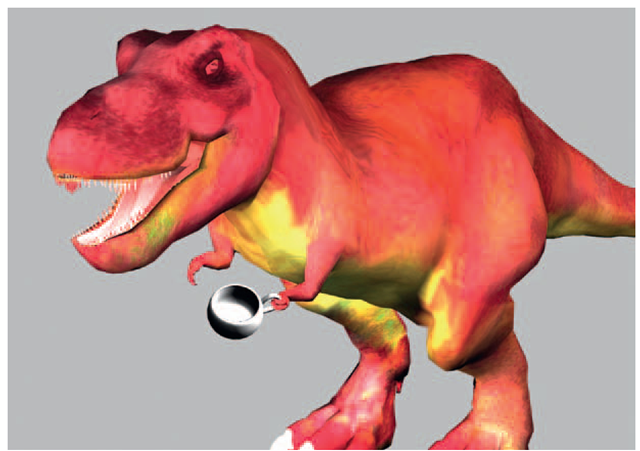
Anyone who has ever animated a character holding a coffee cup (or something of the like), even in a single medium, knows that it is difficult to make sure that the coffee cup moves in sync with the hand. In traditional animation the cup is on a separate piece of paper and the animator has access to the timing chart or x-sheet and knows where the keyframes are and what type of timing was used. She can match similar keyframes and timing to the cup level. An example of this technique is depicted in Figure 1.17. If the same type of animation were to be done in 3D, then constraints could be used to help simplify the issue, as illustrated in Figure 1.18.
Trench Note
For those counting, this is the fourth coffee reference. There’s a quiz at the end, so pay attention.
FIGURE 1.17 Example of 2D elements registering.
FIGURE 1.18 Example of 3D elements registering. 3D model and rigging by Amanda Powell, 2009, SCAD, 3D Character Setup and Animation course.
Any student who has tried to animate a handheld object in 3D without using constraints should instantly cringe at how difficult it is to match the timing. This is what happens when multiple media are combined—the timing must be matched frame by frame.
To do this, it is easiest to know where the keyframes (extremes) are and what type of timing is being used. In the case of a traditional character leading a digital character, is the 2D character’s inbetweens on halves? Thirds? Held? This is not an issue if the animation is completely done on ones (every frame is drawn); however, this is not the common procedure. Maintaining an x-sheet and some style of timing chart is the solution to this problem.
They are rarely used in 3D, which makes the inclusion of them in a 2D/3D animation process alien to the 3D animators.
The use of the timing chart, the chart drawn on a traditional keyframe that communicates to the in betweener how to space the in betweens he must draw, is another traditional technique that 3D animators do not use. Sadly, I see more traditional animation students coming through my classes who do not understand completely, nor use, timing charts. This might be the hardest concept to apply to your pipeline.
It is possible to combine 2D and 3D animation without timing charts and x-sheets; using them, however, will make the process less painstaking. As with all of the previously discussed concepts,we will take care to address this issue and its variations in the upcoming topics.
Image sizes
The last concept that must be resolved for a 2D/3D pipeline is that of image sizes. Because scanned images, rendered images, digitally drawn images, maybe even still photography are to be combined, in order for them to register properly you will need to make sure that you are using the same pixel ratio and have agreed-upon res (resolution) and image sizes for your pipeline. Again, this issue might seem obvious to a solo artist. However, on a group project, nothing is too trivial to outline. Often, different file sizes are used throughout the production to speed up workflow. For example, in the rough stages of animation, reference images need not be at full resolution size, as that will only slow down the software package being used and the transfer of images between artists. Finding ways to use smaller res sizes (all at the correct ratio so that registration stays consistent) will increase productivity. In production, at least three file sizes can be used, and depending on the studio there may be more:
1. Final res. The final render of animation assets that are then composited together (for example, 1280 x 720, image ratio 1 : 77, pixel ratio: 1).
2. Mid res. Used for double-checking registration and getting animation approved (for example, 960 x 540, image ratio 1 : 77, pixel ratio: 1).
3. Low res. Used for initial scans and rough animation. This allows for memory savings and ease of use in 3D animation packages as reference (for example, 512 x 288, image ratio 1 : 77, pixel ratio: 1).
To recap, once the pipeline for reaching a visual style is achieved, then it is decided how assets will go through the pipeline to achieve the best registration based on which asset needs to be created first. Then a test is needed to make sure that the image sizes, as well as frame rate and image format, all flow through the pipeline and end up as a final image that is successful. In topic 2, we will work on this process by working toward a visual style while iterating through pipeline issues.
Judging The Success of 2D/3D Integration
There are a lot of things to consider when combining 2D and 3D animation.How do you know if you’ve done it successfully?
When researching for this topic, students and colleagues brought example after example of 2D/3D combinations to add to my growing list of films. Looking through all of them, one might find that there is one measure that determines whether the 2D/3D combination was successful or not. As all hard-working visual entertainment specialists know (be they editors, VSFXs, compositors, animators, texture artists, lighters—any of us), it is successful if our work is invisible. If our visual style creates a homogeneous image that conveys the emotion of the story, if our registration is executed well and the contact points don’t wiggle, if our animation timing is accurate and our media move well together, if our work is not visible and if the story is told without interruption, then our efforts have been successful.
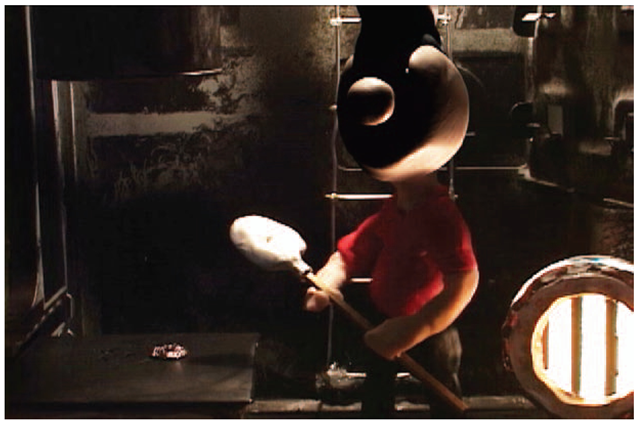
FIGURE 1.19 Stop -motion test with digital head replacement.


