Ones or Twos?
3D animators might not think of this at first. 2D animators will ask this question immediately. 2D is normally drawn on twos. This means that every frame is held for two frames. Why? There is less to draw. Drawing something on ones, or a drawing for every single frame of film, makes for very subtle movement and it is difficult to keep the 2D animating smoothly. It can be done. Certainly there are those who have used a style of animating on ones— Richard Williams, for example. There are also times when you need to put the animation on ones, such as when the movement is very fast. As a 2D/3D animator, you will want the ability to at least be able to put everything on twos and at most be able to control when things are on twos and when things are on ones.
There are many methods to convert your animation in 3D to be on twos. You can do it manually in the graph editor after all of your animation is done; you will do this by inserting keys on every other frame and using stepped between the keys. Although that is fine, it can make it difficult to go back and adjust your animation.
Gregg Azzopardi, one of the technical editors of this topic, suggested this method to me. There is a script that can be found on HighEnd3D called twos.mel. It was written by Jason Schleifer. Schleifer is such a great brain in the rigging for animation field. Enclosed with the companion data for this topic, you will find a modified version of the script.
Dig Deeper
As a plug for Jason Schleifer, if you want to learn rigging, I highly recommend his Fast Animation Rigs DVD (http://stores.lulu.com/ jschleifer). Check out his web page at http://jasonschleifer.com.
Install the script
To use this script, you will want to copy the twos.mel script into your scripts folder. Generally this is in your home directory, maya/ XXXX/scripts. Substitute the version of Maya you are using for XXXX.
Restart Maya, or if Maya is already open you can type rehash in the command line. (Remember to hit Enter on the keyboard.)
Use the script on character sets
If you are using character sets to animate, like we used in the example files, follow these steps:
1. Select the character set in the outliner.
2. In the command line, type twos and hit enter on the keyboard.
It will take a moment as the script goes through all of the animated attributes in your character, checks them, and then adds a node that controls the animation curves and sets them to run only on twos.
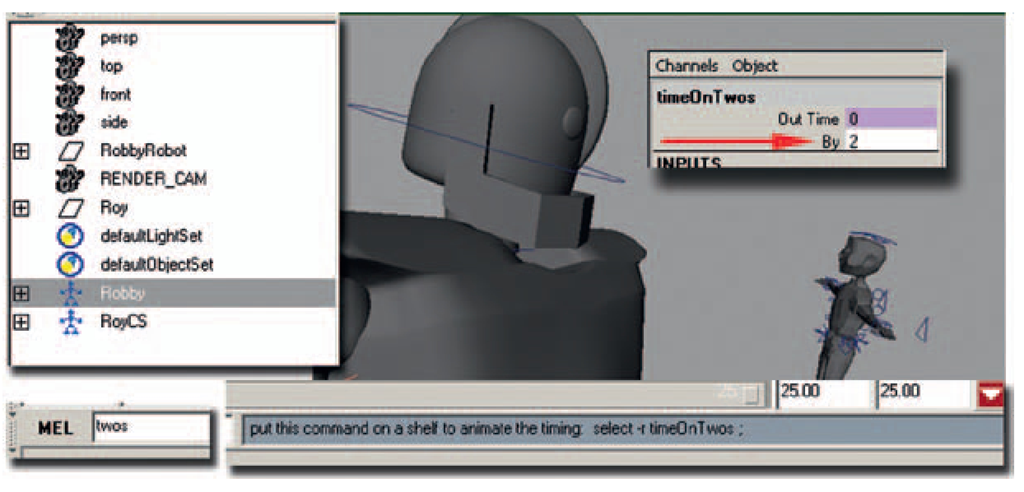
The script will then prompt you to add the following line on your shelf: select -r timeOnTwos. If you middle-click on those words and drag them to a shelf, Maya will create a button. When you click on that button, it selects the node that Schleifer’s script has created for you. This node controls the timing.
FIGURE 3.7b Jason Schleifer’s twos.mel script in action.
By default, the “by" attribute is set to 2. You can simply keyframe that to different step rates to enjoy your animation on twos and on ones (or other increments) as needed.
When you play back your animation in Maya and look at the timeline or graph editor, you will notice that everything still looks the same. This script does not interrupt your animation process or the sweetening process at all. ( Those wearing geek hats can check out the Hypergraph Connections editor to see the node and math expression that Schleifer has created to make this as seamless as possible.)
If you wanted to go back and animate Roy to use as reference, maybe just a few key poses of how he would react to being hoisted up into space, you will want to also put his animation on twos. Currently, he is following along with the robot, so you do not need to do anything special to his timing. If you did animate him, you would want to go through the same steps as outlined earlier: selecting his character set and typing twos into the channel box. He will be hooked to the same timeOnTwos node and By attribute. This is great. That means that your reference object will stay with the same timing as the robot. That is one of the hardest things to have to worry about—making sure that the 2D animation has the same keyframes and timing as the 3D. Why? If the 2D animates on frames when the 3D is holding still (or vice versa), things start to wiggle and you give away the illusion of registration.
Also, if you are not using character sets, you can select all of the animated controls and use the script. The result will be the same.
3D Animation is Done, Now What?
When do we put toon lines on our animated characters? When do we do the final 3D render? When do we start animating our 2D character?
Good questions. In a production setting, you want to have your animation completed (and approved) first before you begin working on the final look. Iterations to a quick approval, adjustment, or a quick removal are key to not wasting time on production.
Because our 3D animation is complete and is to be handed off to the 2D department, let’s also hand it off to the rendering department. If you are a one man or woman show, then I would suggest skipping the Toon Line Shading section until you have finished roughing in your 2D animation.
3D Leads 2D: Ton Fill Shading
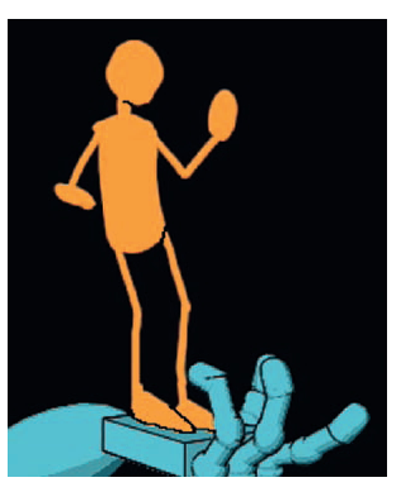
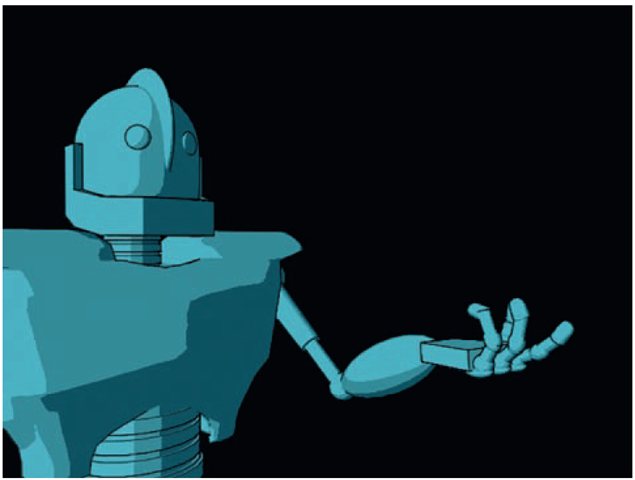
Here we will apply toon shading to our 3D character, Robby. We are trying to get flat color with a little shading for the paint fill and a thick and thin line to match a 2D character’s cleaned-up line.
FIGURE 3.8 2D character.
FIGURE 3.9 3D character with toon line.
Open the File
Open the animation file that you saved or our file Robby_ 3DLeads2D_3.mb.
Fill shader
First, to work with our geometry and put shading on it, we will have to be able to select it. Most modern rigs have the geometry locked down so that the animators cannot touch it and harm it in any way. (If they didn’t and are in my class, that is 10 points off.)
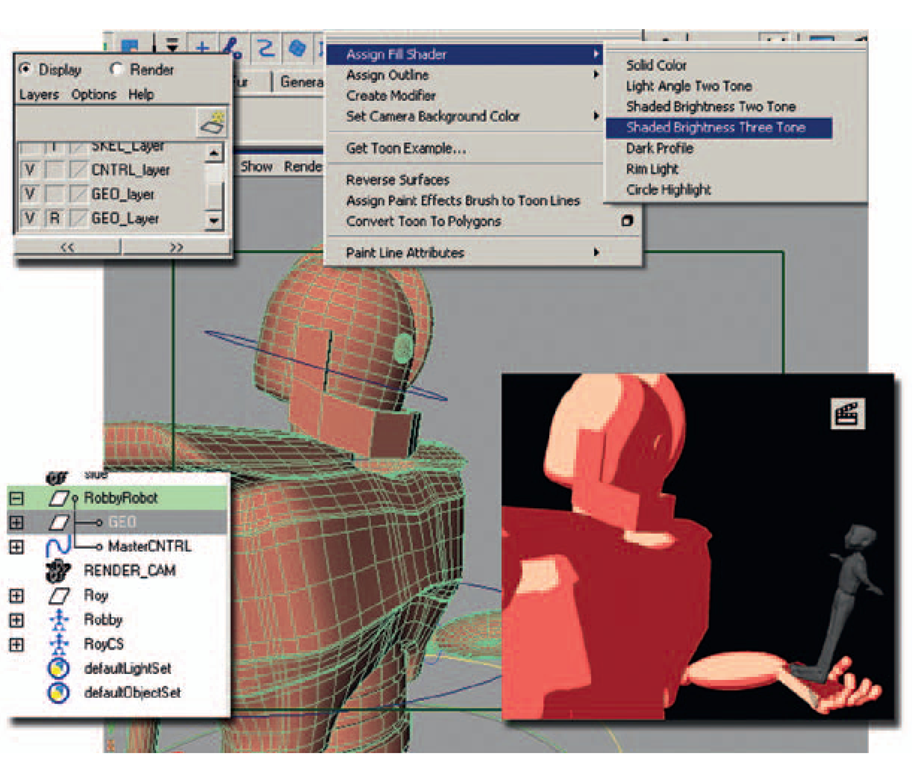
1. In the Layer panel, locate the GEO layer and make it editable by clicking on the R (R stands for reference; the object cannot be selected). Once you click the R, it will become a T (T stands for template; the object cannot be selected and it is displayed as a pink wire frame). Click again on the T and the box will become empty. Now the contents of that layer are editable.
FIGURE 3.10 Make the GEO selectable.
2. In the perspective window, select the robot’s geometry and press the up arrow on your keyboard to select all of the geometry. (You can also locate the GEO group node in the outliner for the robot.)
3. In the Rendering area, select Toon > Assign Fill Shader > Shaded Brightness Three Tone.
4. Click on the Render icon to see what the fill shader looks like.
FIGURE 3.11 Render icon is clicked to see Toon Fill Shader on Robby.
Take Note
If you apply toon fill to an object and it turns out very chunky, there is an easy way to fix it. Toon Fill shaders will show faceting of low poly objects unless they have soft normals.
5. With the mesh selected, go to the Polygons area and select Normals > Soften Edge.
6. Re-render the frame to see the better results.


