Animate
The odd thing to get over when animating 3D on top of 2D is that you can move your camera all around to get the object looking like it is in the correct spot. The thing that matters is what the final image is going to render out like. So you can do some unconventional movement in the camera placement to cheat perspective or use it to your advantage. Beware: overuse of this power can make for some odd-looking animation.
Because we have the knowledge of what frames are keyframes via the x-sheet and we have an understanding of what timing was used via the timing charts, we have an easier time of matching the 3D animation to the 2D animation:
1. Import in the 3D arm rig. Click File > Import and locate the ArmRig_v1.mb file. This will bring in the arm at the origin.
2. Use the Perspective and orthogonal views to position the arm so that it looks like it is in the correct spot in the Render_Cam view.
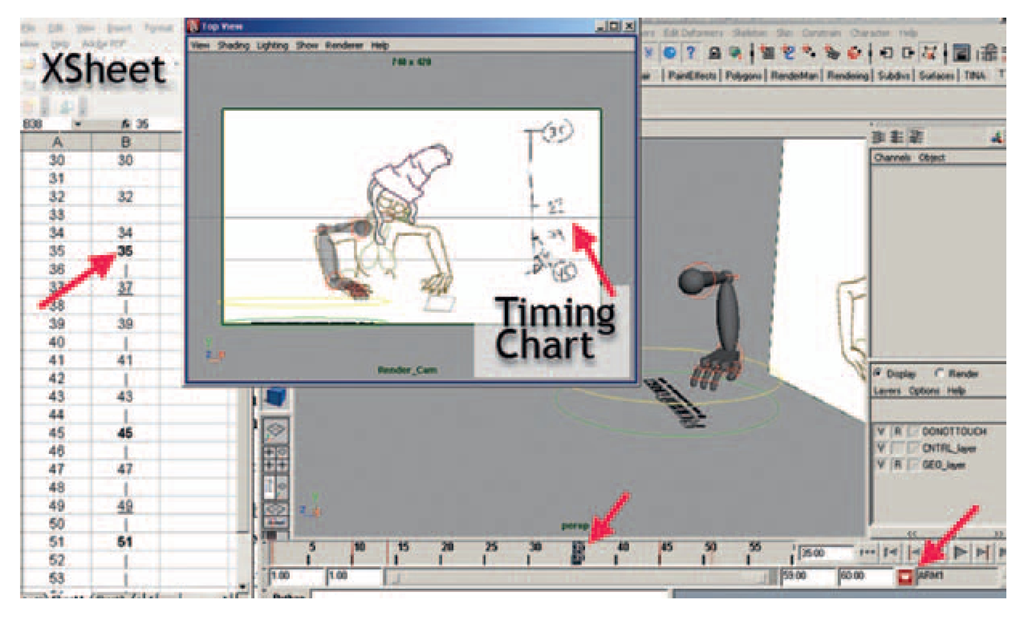
3. Find the keyframes on the x-sheet and pose your arm for those main keyframes. Our x-sheet for this example is on a simple Excel spreadsheet: x-sheet.xls. You can see the spreadsheet on the left side of Figure 4.20.
To help pose the 3D arm better, the Render_Cam has been torn off.Also, Shading > Xray has been chosen so that the animator can see through the 3D object to the 2D arm. If you have the 2D roughed-in arm, that will help you pose your limb. Of course, the perspective hand-drawn will not match. Look to match the contact points, the shoulder and wrist, more than the elbow.
To set keyframes easily, this 3D arm has a character set: Arml. Select the character set for the arm and hit “s" for each keyframe. As Figure 4.20 shows, keyframes set in the timeline correspond to the x-sheet. You’ll note that the perspective camera is used to pose the arm in 3D space so that it looks correct in the Render_Cam view.
FIGURE 4.20 Keyframes set in Maya.
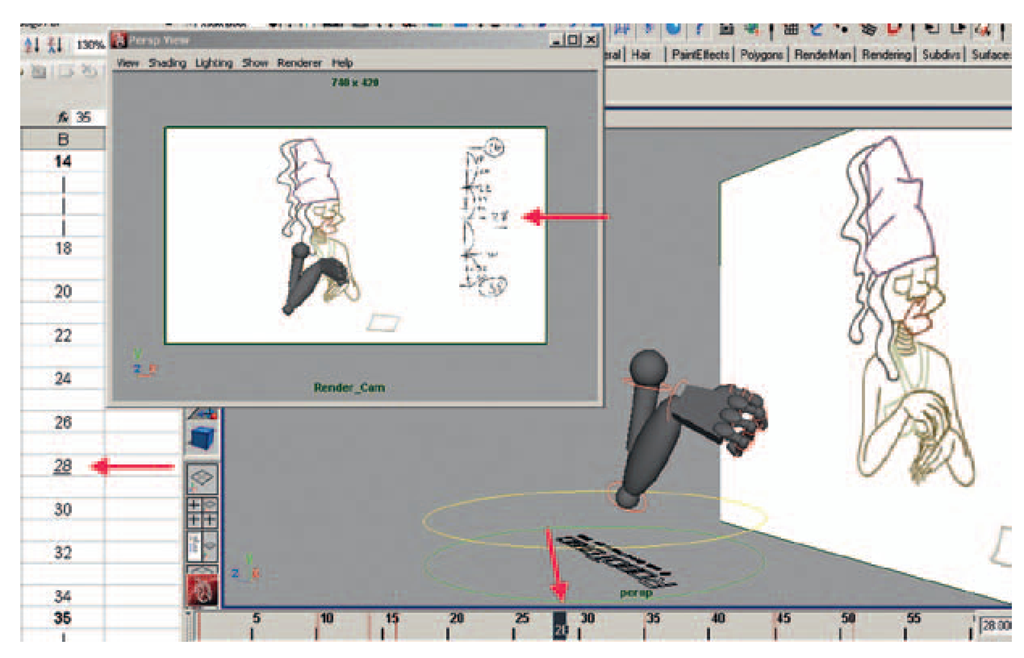
4. Next, look for breakdowns and the spacing they should have, and create keyframes for your arm. Again, if you have a timing chart from the 2D animation, you should be able to match the same spacing and achieve better registration with the 2D character. If you do not have a timing chart, you’ll have to guess where the breakdown is and know that the next step is going to take much longer. In Figure 4.21, the breakdown 28 is halfway between the keyframe for 16 and 35. (For those truly following along with the enclosed data, frame 16 is held from frame 14, and in the enclosed example, frame 28 was moved to 29.)
FIGURE 4.21 Breakdowns set in Maya.
5. Remember to roll through your drawings often to make sure that the arm registers in its socket. Look for jiggling at the contact point and adjust your keyframes to eliminate the jiggling.
6. Now, add your inbetweens. Use the graph editor to adjust the final spacing of the drawings to match the 2D.
Take Note
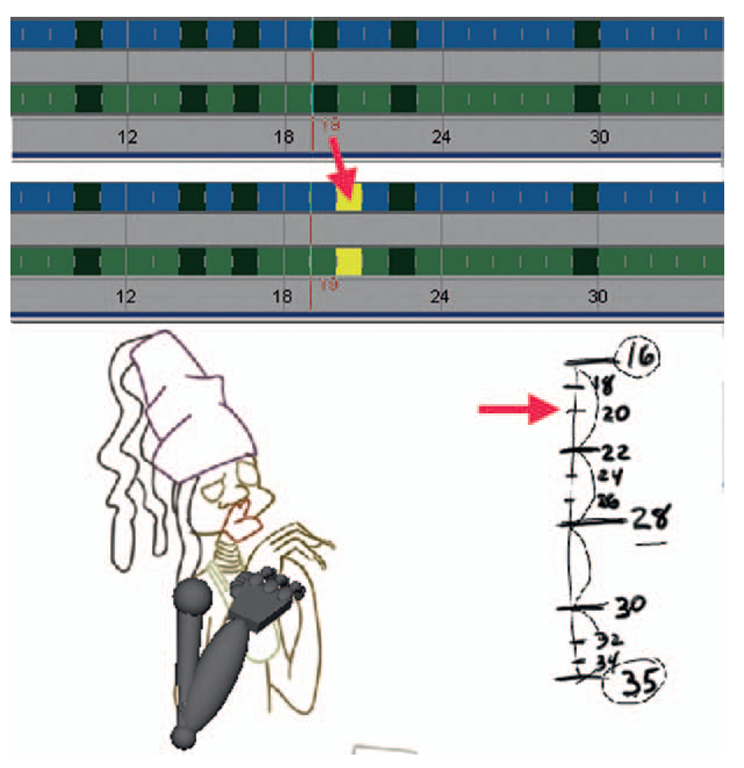
A note on following the timing chart. With the timing chart showing where breakdowns are on halves, or halfway between the keyframes, you can speed up your workflow and use Maya to your benefit. For instance, the timing chart between frames 16 and 28 calls for frame 22 to be halfway between the keyframes. Set the tangents on frame 16 to be linear. Frame 22 will then be mathematically halfway between the two keyframes. Go to frame 22, take a look at the drawing, and adjust as necessary to put things on arcs or add overlapping action and so forth, then hit "s" to set a keyframe.
FIGURE 4.22 Using Maya’s inbetweens but moving them to the correct time to match the timing chart.
The next half on the timing chart is for frame 22. That drawing is supposed to be halfway between frames 16 and 22. Let Maya do the work for you. Locate the inbetween that Maya has made that is visually halfway between frame 16 and frame 22. In our example, it is on frame 19. Go to frame 19 and hit “s” on the keyboard to make that a keyframe in Maya. Then simply use the dope sheet to move the keyframe to frame 20 as the timing chart indicates. Now you can more easily go in to the graph editor and adjust your spacing by moving the tangents. Your timing, where the keyframes and breakdowns are, is already in place. This method speeds up your workflow tremendously. Use Maya to do the work for you, but control it so that you don’t end up with Maya inbetweens. The horror.
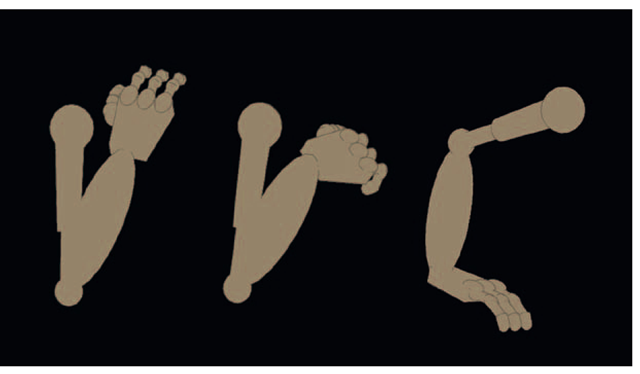
FIGURE 4.23a Completed animation in Maya.
7. We’ll use your twos.mel script to put this animation on twos:
a. In the outliner, select the character set.
b. Type twos in the command line.
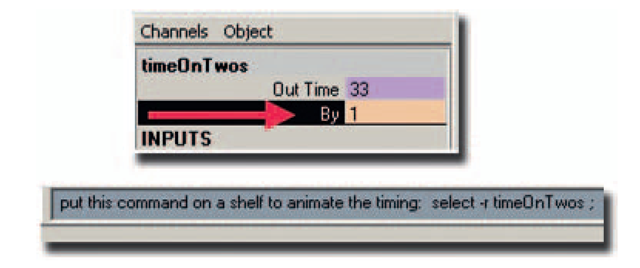
c. You will receive the feedback: put this command on a shelf to animate the timing: “select -r timeOnTwos.”
d. Highlight the command “select -r timeOnTwos” and middle-mouse drag it to a custom shelf so that you can use it later on.
e. Scrub through your animation to see that your work is now on twos.
What? Oh. Your animation isn’t always on twos? That is the case sometimes, isn’t it? Let’s look again at our animation. If you have timing that is on ones at some points and on twos (or fours, etc.) at others, you can animate what the script has set your timing to be. It isn’t too hard either. I like this method much better than setting every key on stepped and manually, making every keyframe on twos.
f. If you haven’t clicked anything since running the script, the timeOnTwos node is still selected and you can see it in the channel box. If not, you’ll need to click on the button you made or type into the script editor: select -r timeOnTwos.
g. You can animate this attribute as needed to adjust your timing. With the time set to frame 1, right-click on the attribute and keyframe selected. This will set a keyframe for timing on twos.
h. Advance to a frame where you need the timing to change to ones and change the By attribute to 1 . Set the keyframe on that attribute.
i. This way you can adjust your ones and twos but still use the graph editor without creating a large mess.
FIGURE 4.23b Using twos script to put 3D animation on twos.
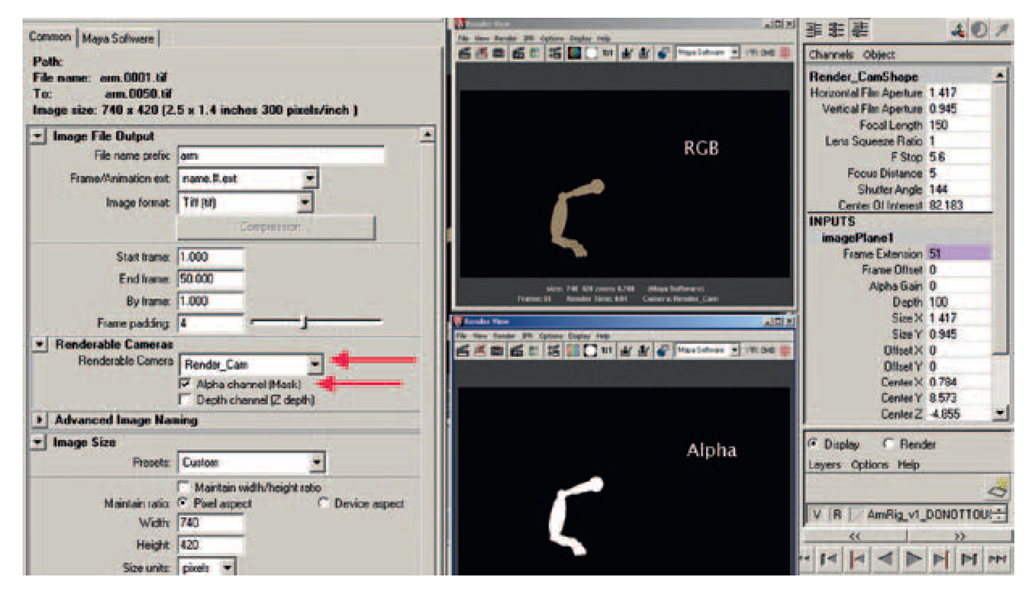
8. Render the animation. There is already a toon shader and ink line on the arm for you. You need only to render the arm level. This means that you do not want the image plane to render. How do you get rid of that? You can either delete the image plane at this point or adjust the alpha gain for the image plane to be 0. Then render as follows:
a. Set the render settings. See Figure 4.23c.
i. Name the level
ii. Name.# extension
iii. .tif (or something that keeps alpha channels)
iv. Start and end frames
v. Frame padding
vi. Select the correct camera
vii. Make sure to include alpha channels
viii. Make sure your size is correct
b. Click Render > Batch Render.
FIGURE 4.23c Render settings and example of final renders.
Our arm level file names are arm.#.tif.
How did you do? Things should start to seem a lot easier now. If you did not have a good grasp on the graph editor to begin with, this might be a little tricky for you. Please, avoid keyitis. This is a horrible disease where the animator that does not feel comfortable in the graph editor begins to compensate by setting keyframes on every frame. Yes, you can do this, but you start to get into stop-motion animation at that point, where everything is being moved manually and no matter how hard you try, there will be pops and jumps between images. Of course, if you are going for a stop-motion feel—don’t do it that way either. There are procedural ways to adjust your timing to get the same type of feel. I can’t stop you. If you have to go through your keyitis phase, go ahead, get it out of your system. If you start to miss your quotas, come back and conquer your fear of the graph editor. Kudos to my students who I have seen work hard on getting over their graph editor fear.
Take Note
Remember, if you render out .tif images, they do not read into Photoshop with their alpha channel. .tifs are fine for every compositor that exists, just not Photoshop.
