Graphics Reference
In-Depth Information
From the Edit menu, select
Size
to display the Size window,
then choose the appropriate actions. If you choose Width or
Height, you'll need to enter the dimension you want for the
finished item in pixels.
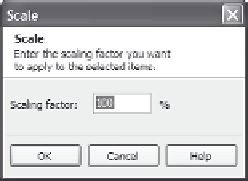
From the Edit menu, select
Scale
to display the Scale window,
then enter a percentage. For example, to scale the image to be
half the size it originally was, type
50
.
Figure 12-30. Rescale
selected items.
Tip:
The scaling factor is applied to each dimension, not to the
area of the image or click box. For example, you have an image that
is 100 x 100 pixels (for a total area of 10,000 pixels) and want to
reduce it to half the original size. When you enter a scaling factor of
50%, the resulting image would be 50 x 50 pixels (for a total area of
2,500 pixels). Each dimension has been reduced 50%, and the total
area is now one-fourth the size of the original item.
3.
Click
OK
to close the displayed window, if any, and view the
resized items.
Setting Project Options
Up to this point, you've been working with the individual menu items.
You can also adjust other components on the slide by using the
MenuBuilder Project Options window. Follow these steps:
1.
Do one of the following to open the MenuBuilder Project Options
window:
From the Options menu, choose
Project Options
.
From the Project Tasks list on the left side of the screen, click
View project information
.
From the top of the screen, click the
Project
icon.