Hardware Reference
In-Depth Information
After determining what the project scope is, the next step is to come up with a schemat-
ic diagram of the project. After all, this is the hardware and software parts of the project,
which are supposed to function in a way to carry out the main task of the project.
Let's draw schematic diagram of the project in a way that we think it can carry out the
task of controlling all push buttons, 7-segments displays, LEDs etc.
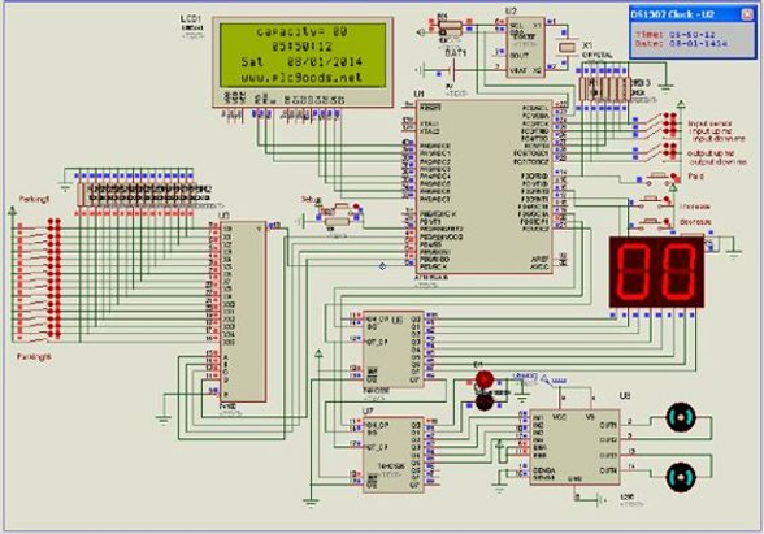
We might be able to come up with a circuit diagram as shown in
Figure 1.5
and try to
figure out if that is going to be able to control different electronics of our project nicely. No
problem to test the circuit and code at this stage. Our big brothers already have developed
two great software-
CodevisionAVR
®
and
Proteus
®
that can help us to generate code and
simulate the circuit respectively. So, at next step, we may go ahead and start generating
program code for ATmega16 microcontroller after putting all components on the edit
screen of the great
Proteus
software.
Figure 1.5: displays Proteus generate schematic diagram of the project.
Search WWH ::

Custom Search