Graphics Reference
In-Depth Information
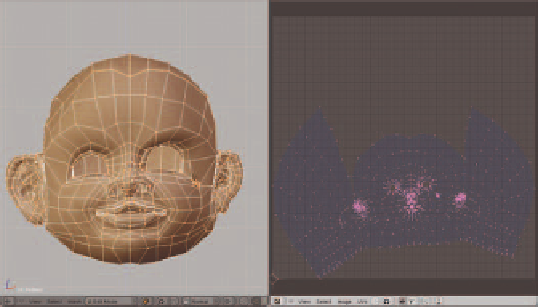
Figure 5.18
The default unwrap for the head
Now, the two models must be placed at the same point in space, which can either be accomplished through
using the Snap tools or selecting both objects and using
Ctrl-
C
. Then, on the
Bake
panel of the Render Buttons, both the
Selected to Active
and the
Normals
buttons are enabled and
the normal space is set to
Tangent
, as in Figure 5.19.
The baking process moves from
selected object
to
active object
, so
be sure to select the high-resolution mesh fi rst, followed by
the low-resolution one. With both selected, and making certain
that the low-resolution mode mesh was selected last, making it
the active object, press the
Bake
button. Blender will chug for
a little bit because it is rendering an image that represents the
difference between the normals of the high and low resolution
objects. When it is fi nished, check the
UV/Image Editor
win-
dow to see the result (Figure 5.20).
Figure 5.19
Ready for Normal baking
At this point, you should save the normal map to a fi le so
you don't lose it. It can then be used on the low-resolution
model by setting your materials appropriately. The cru-
cial settings are the
Normal Map
and
Tangent
settings
in the Texture buttons, and using
UV
texture coordinates
and the
Nor
button in the Material settings, as shown in
Figure 5.21. Make sure to use the
Image
texture type and
to
Load
the saved normal map image into the texture.
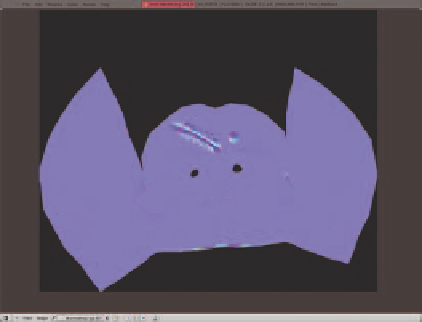
Now a render shows the scar appearing on the low-res-
olution head, but without the almost 400,000 polygons
of the sculpted model. A side-by-side comparison shows
very little visual difference between the two rendered
Figure 5.20
A simple normal map

Search WWH ::

Custom Search