Graphics Reference
In-Depth Information
●
Returning to the
Shapes
panel, fi nd the shape name into which you wish to sculpt and enter the
“sculptable” vertex group into the
Vgroup
fi eld. This prevents the shape from affecting the rigid parts
of mesh, and, because you are sculpting directly into the shape key, it also prevents the sculpt tools from
moving any of the vertices that are not in the group.
When you are fi nished sculpting, remember to unlock the shape by disabling the pin icon.
In addition to the sculpting tools, you can also work on your shapes with the standard Edit mode tools.
Particularly helpful will be the
Proportional Editing
transformation (
O
key) so that any edits you make
will remain smoothed with the rest of the mesh.
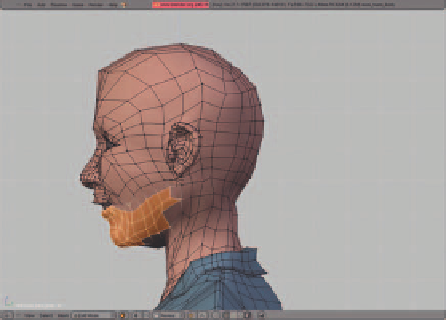
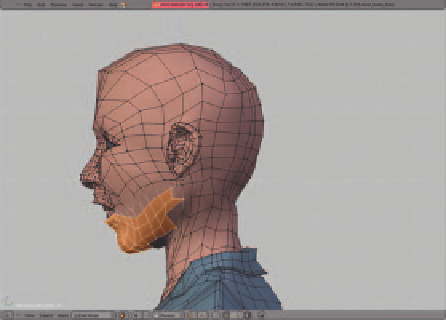
Edit mode will be most useful when making edits that involve rotating the mesh, such as curling the edges
of the lips upward in a smile or rotating the jaw downward for an open mouth key. Figure 10.24 shows the
mother's jaw being rotated open with a pivot point set where the hinge of the jaw would be. It can also be
handy to save certain selections, like a loop of edges around the mouth, into vertex groups. They can be called
up any time you need to; for example, to widen the mouth in an expression: Select the mouth loop vertex
group and scale along the X-axis.
Figure 10.24
Using Edit mode to create a “mouth open” shape
NOTE
When you begin to control your shapes, you will fi nd that you can have them extrapolate past the
original deformation into an even more extreme shape. While this is useful, it can lead to some
artifacts and less than ideal exaggerated states. For that reason, try to create your shapes with
some of that exaggeration already built in. If you make your shapes in an already “beyond the
norm” fashion, you can always choose to use the shape at less than full strength for a more tradi-
tional effect, while retaining the ability to go even further and still have a nicely formed expression.

Search WWH ::

Custom Search