Graphics Reference
In-Depth Information
To get out of Weight Painting mode, press
Ctrl-Tab
again. If
you need to adjust the weights at any time, you can reselect
the mesh and use
Ctrl-Tab
, selecting different bones to show
their infl uence on the mesh.
Of course, armature modifi ers, weight painting, and vertex
groups aren't the only way to deform your mesh. Before you
spend a whole day creating and refi ning vertex weights, let's
take a look at the Mesh Deform modifi er, which can make
the job much easier.
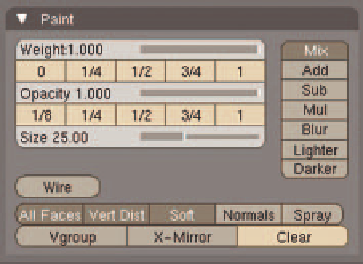
Figure 9.31
The Paint panel in the Edit buttons
The Mesh Deform Modifi er
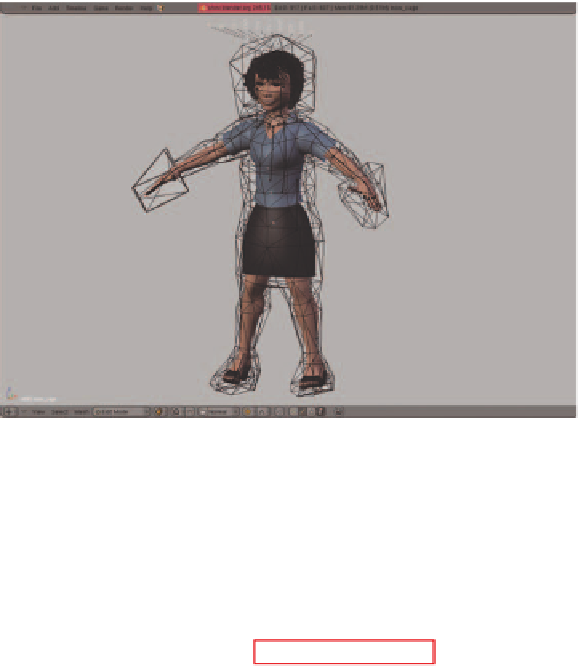
Figure 9.32 shows a cage surround-
ing both the mother mesh and the
control armature. This cage is a reg-
ular mesh object, composed of trian-
gles (not quads!) and fully enclosed
(no holes). Every face of the charac-
ter mesh is inside of it. This simple
mesh, just over 300 vertices, acts as
a controllable deformer for the high
resolution character mesh. Pixar cre-
ated the technique, and, after the
release of their paper on the subject
in 2007 (they call it
harmonic coordi-
nates
), one of the Blender developers
(Brecht van Lommel) implemented
it for our animating pleasure. If you
are looking for very sharp bends and
creases in your deformations, this may not be the method you
want to use due to its smooth nature. On the other hand, if
you will be deforming things such as a chubby baby or a furry
dog, this method is ideal.
Figure 9.32
The mother with a mesh deform cage
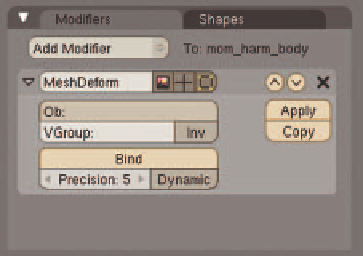
To use it, you create a low resolution cage around your charac-
ter, such as the one in Figure 9.32, then add a
Mesh Deform
modifi er to the character mesh. The name of the deforming
cage is entered in the
Ob:
fi eld, just like it was for an Armature
deformer. In this case, though, the binding is not done through
weight painting, vertex groups, and bones. It is accomplished
by pressing the
Bind
button, as shown in Figure 9.33
.
Figure 9.33
A Mesh Deform modifi er
Search WWH ::

Custom Search