Graphics Reference
In-Depth Information
tion, we can leave this third bounce in, secure in the knowledge that we'll be covering it with different foot-
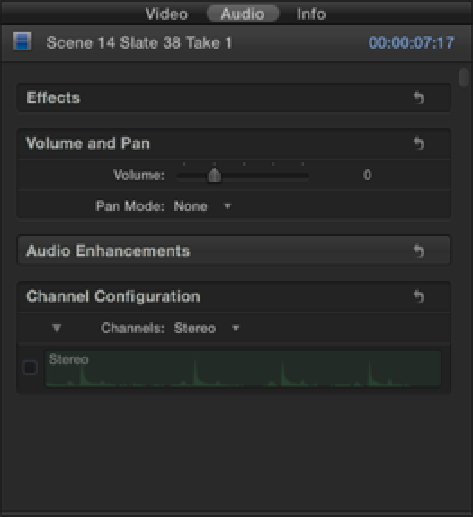
age later. Now we need to remove the audio from Scene 14 Slate 38 Take 1 so that only the Bouncing Ball
clip is heard. Select Scene 14 Slate 38 Take 1 in the Timeline, and press +4 to open the Inspector. Choose
the Audio tab and uncheck the check box for the audio found under Channel Configuration (see Figure
11.16).
Figure 11.16
Removing a clip's audio in the Inspector.
4.
There is a gap clip just before Scene 14 Slate 38 Take 1 in the Timeline that we need to eliminate.
However, we're faced with a few problems if we simply delete it from the Primary Storyline. Deleting the
gap clip also removes the Bouncing Ball clip that is attached to it. We could always solve this by linking the
Bouncing Ball audio to another clip in the Primary Storyline, but this still wouldn't allow us to simply de-
lete the gap because doing so would move the following clip (Scene 14 Slate 38 Take 1) down in the
Timeline, and it would no longer be in sync with the Bouncing Ball audio. The same would be true if we
closed the gap with a Ripple edit. This is where the Position tool comes in handy. Press P to bring up the
Position tool and use it to select the In point for Scene 14 Slate 38 Take 1. Drag the In point all the way to
the left so that the clip snaps to the end of Scene 14 Slate 40 Take 3 and the gap has been completely re-
placed (see Figure 11.17)
.
Press A to switch back to the Select tool and play back the edit to see the result.