Graphics Reference
In-Depth Information
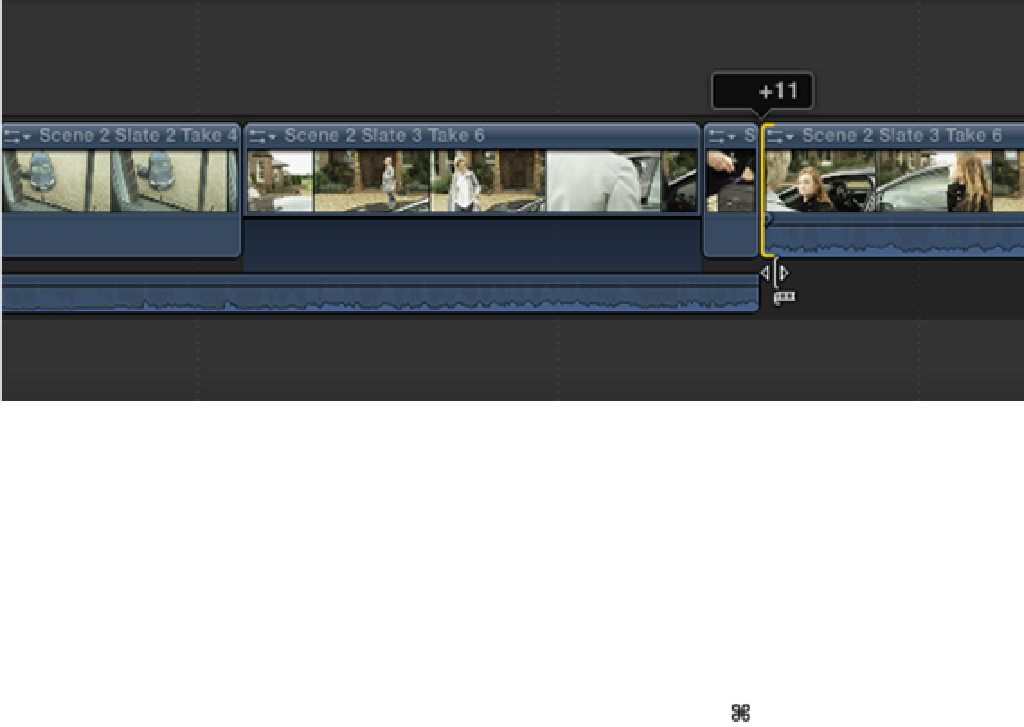
Now we're free to manipulate the In point of the following clip to tighten up the cut. Select the In point for
the second instance of Scene 2 Slate 3 Take 6 in the Timeline and ripple to the right by 11 frames (see Fig-
ure 9.14). Press the Home key to go to the beginning, and press the Spacebar to play back the sequence.
Figure 9.14
A Ripple edit tightens up the cut.
10.
The next part of the scene's action concerns Katie walking up to the house and spotting someone at the
window. In the current sequence in the Timeline, Katie has her back to the camera and we can't see any fa-
cial expressions when she stops to look up at the house. This is an important moment, because it sets up a
potential obstacle for Katie that will be revealed later in the story. The audience, therefore, needs to see that
Katie is concerned about the possibility of another person in the house.
Set the Event Browser's Filter pop-up menu to All Clips. If we look through our footage in the Event
Browser, we can see that Scene 2 Slate 5 Take 1 covers this part of the action with Katie facing the camera.
Let's find a good place to add this clip in the Primary Storyline. Position the playhead at 33 seconds 11
frames in the Timeline just before Katie stops to look up at the house. Press +1 to make the Event
Browser active and skim through Scene 2 Slate 5 Take 1, stopping when Katie once again pauses to glance
up at the house (see Figure 9.15). This is at 15 seconds 12 frames into the clip. Press I to mark an In point
and press D to overwrite Scene 2 Slate 5 Take 1 to the Primary Storyline. Play back the section to see the
result.