Graphics Reference
In-Depth Information
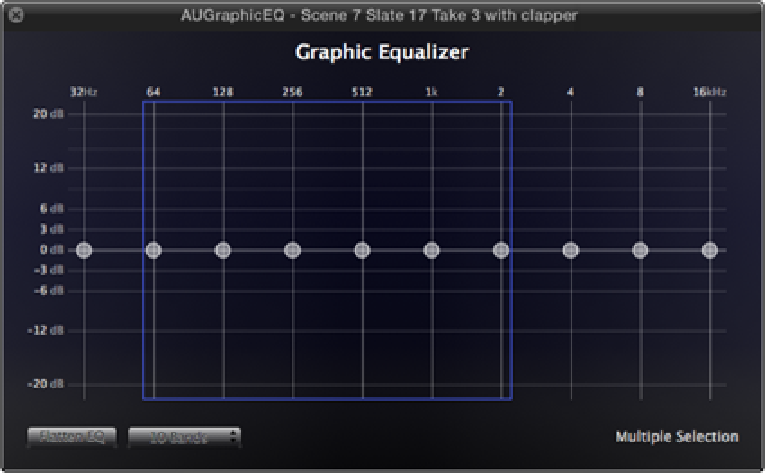
volume displays in decibels in the lower-right side of the window. You can select a group of frequencies by
dragging a blue selection over their faders with the mouse, allowing you to alter more than one band at the same
time (see Figure 8.22). If you need to reset the Graphic Equalizer, click the Flatten EQ button to return all the
frequencies to zero dB. EQ presets also are available for common uses such as Bass Reduce and Voice Enhance;
you can access them from the Equalization pop-up menu under Audio Enhancements in the Inspector.
Figure 8.22
Dragging a blue selection over the EQ's faders.
The Graphic Equalizer isn't the only way to apply equalization to your audio clips; many other EQ plug-ins can
be found in the Effects Browser. Figures 8.23 and 8.24 show a Parametric Equalizer plug-in along with its con-
trols in the Inspector. A Parametric Equalizer allows for finer adjustments and more detailed control than a
Graphic Equalizer; it has three main controls. The Center Frequency slider selects which frequency band is be-
ing affected and the Q slider specifies how narrow or wide that frequency band is. How much of the chosen fre-
quency is boosted or cut is determined by the Gain control slider. The Parametric Equalizer graphic interface
(see Figure 8.23) can be brought up in the same way as the Graphic Equalizer: by clicking on the EQ icon at the
top of the Parametric EQ control panel in the Audio Inspector.
Figure 8.23
The Parametric Equalizer interface.