Graphics Programs Reference
In-Depth Information
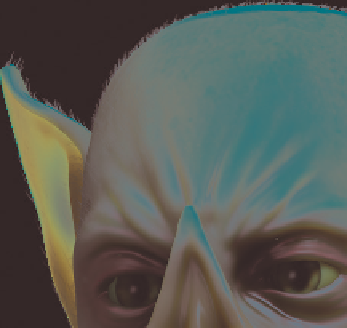
Peach Fuzz
I set up a very similar material for the peach fuzz
particle system. For this material, I decreased the
size settings for the strands to make them thinner
and reduced the overall alpha of the material to
make the hair look wispier. The resulting material
can be seen in Figure 12-25. It mainly shows up
around the edges of the body, which is just what I
wanted.
This completed my materials for the Bat
Creature.
space for the Node editor as well as the preview,
I split the default layout once by right-clicking on
the bottom edge of the 3D Viewport and choosing
Split Area. Then, I split the left-hand area in two,
horizontally.
Once I split up the work area, I made one of
the new areas into a Node editor and the other
into a 3D Viewport, with its Display Method set to
Rendered. In the Node editor header, I selected
the materials icon in the left-hand group of icons
and the cube icon in the right-hand group (see
Figure 12-27) so that the Node editor would display
the node tree for the current material. This gave me
a workable layout for editing Cycles materials.
The Cycles Render Preview
When the Display method for a 3D Viewport is set
to Rendered, Blender will continuously render and
update a Cycles render of the current view in that
viewport (as in Figure 12-26). This technique is a
great way to get instant feedback on how the materi-
als and lighting in your scene will look.
*
While we haven't covered lighting yet, it's helpful at
this stage to add some basic lights to the scene so that
the rendered preview will reflect the final look. Jump
to Chapter 13 for more on lighting, or simply add a
couple of lights to the scene by pressing
shift
-A in the
3D Viewport, choosing
Lamps
4
Point
, and adding a
point light. Adjust the brightness of the light using the
Strength setting in the Object Data tab of the Properties
editor. Add a couple of basic lights to the scene just to
help work on materials, or create a more finished light-
ing setup.
Figure 12-25: My peach fuzz hair provides a
more subtle effect; it adds a bit of a halo of
fluff around brightly lit parts of the model.
Materials for the Spider Bot
For the Spider Bot, I chose to use Blender's Cycles
renderer because it allowed me to create some
nice shiny materials to complement the model. I
began by creating a single material to apply to all
the (textured) parts of the Spider Bot mesh. You
can use the Material Utils Script to do this quickly:
Simply enable it in Blender's Add-Ons menu (
User
Preferences
4
Add Ons
) and use the shortcut
Q
to
assign materials to all your selected objects at once.
By default, when you create a new Cycles material
for an object, Blender will assign a diffuse BSDF
shader, like the one shown in Figure 12-26. The
default material will be a plain matte white.
Adding Textures
Next, I started combining further shaders into my
material. I began by adding a Glossy BSDF shader
(
shift
-A
4
Shaders
4
Glossy BSDF) and using an Add
Shader Node to blend the glossy and diffuse shad-
ers by connecting both of the shader output sockets
from the Shader nodes to the Add node and by con-
necting the Add node output socket to the Material
Output node (see Figure 12-27).
Next, I started incorporating my textures,
beginning with my diffuse map. I added an Image
Texture node (
shift
-A
4
Text u re s
4
Image Texture)
and opened my diffuse map by clicking the folder
icon in the node. I connected the color output
of this node to the color input of my Diffuse
Shader node.
Editing Node Materials
To edit Cycles materials, use Blender's Node editor,
keeping it visible alongside the 3D Viewpoint with a
render preview of the scene (a major advantage over
Blender Internal that I'll discuss shortly). To allow
Search WWH ::

Custom Search