Graphics Reference
In-Depth Information
representing every detail of the fine-grained structure of the material. Consider
the complexity of the mesh that would be required to model the dimples and cran-
nies of the rough-hewn stone of an ancient pyramid—our simple four-triangle
mesh would balloon into a mesh of millions of triangles, exploding the memory
and processing requirements of our application.
Through the “trick” of
texture mapping
(wrapping a 3D surface with a 2D
decal), complex materials (such as linen or asphalt) and complex scenes (such as
farmland viewed from an airplane) can be roughly simulated with no increase in
mesh complexity. (Chapters 14 and 20 discuss this idea in detail.) For example,
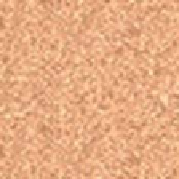
the desert sand in our scene was modeled as a square (two adjacent coplanar right
triangles) wrapped with the image shown in Figure 6.29.
Figure
64
image of a tan-hued pattern to
simulate a sandy desert floor.
6.29:
Square
64
×
“Texturing” a 3D surface in WPF corresponds to the act of covering an object
with a stretchable sheet of decorated contact paper. Theoretically, we must spec-
ify, for each point
P
on the surface, exactly which point on the paper should
touch point
P
. In practice, however, we specify this mapping only for each
ver-
tex
on the surface, and interpolation is used to apply the texture to the interior
points.
This specification requires a coordinate system for referring to positions within
the texture image. By convention, instead of using exact integer pixel coordinates,
we refer to points on the image using the floating-point texture coordinate sys-
tem shown in Figure 6.30, whose axes
u
and
v
have values limited to the range
0to1.
(0,0)
u
-axis
(1,0)
(1,1)
(0,1)
In XAML, the first step is to register the image as a diffuse material in the
resource dictionary. We have used a solid-color brush previously, but here we
create an image brush to define the material:
Figure 6.30: Floating-point tex-
ture coordinate system applied to
the sand-pattern image, with the
origin located at the upper-left
corner.
1
2
3
4
5
<DiffuseMaterial x:Key=
"RSRCtextureSand"
>
<DiffuseMaterial.Brush>
<ImageBrush ImageSource=
"sand.gif"
/>
</DiffuseMaterial.Brush>
</DiffuseMaterial>
(
2
9999,0,
2
9999)
(9999,0,
2
9999)
The next step is to register into the resource database the simple two-triangle
mesh representing the ground, using the same technique as before, but adding a
new attribute to specify the corresponding texture coordinate for each vertex in
the
Positions
array:
x
-axis
(
2
9999,0,9999)
(9999,0,9999)
1
2
3
4
5
6
7
8
<MeshGeometry3D x:Key=
"RSRCdesertFloor"
Positions=
"-9999, 0, -9999
9999, 0, -9999
9999, 0, 9999
-9999, 0, 9999"
TextureCoordinates=
" 0,0
(0,0)
u
-axis
(1,0)
1,0
1,1
0,1 "
TriangleIndices=
"0 1 3
1 2 3"
/>
Since this is a mapping from a square (the two coplanar triangles in the 3D
model) to a square (the texture image), we declare texture coordinates that are
simply the corners of the unit-square texture coordinate system, as shown in
Figure 6.31.
(0,1)
(1,1)
Figure 6.31: Mapping world-
coordinate vertices on the two-
triangle
With the material and geometry registered as resources, we are ready to instan-
tiate the desert floor:
model
of
the
desert
floor
to
corresponding
texture
coordinates.