Graphics Reference
In-Depth Information
1
2
3
<GeometryModel3D
Geometry=
"{StaticResource RSRCdesertFloor}"
Material=
"{StaticResource RSRCtextureSand}"
/>
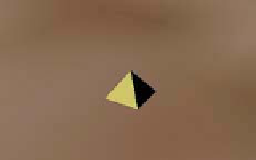
The result is shown in Figure 6.32, from a point of view high above the pyra-
mid. The result is not acceptable; there is some subtle variation in the color of the
desert floor, but the color patches are huge (in comparison with the pyramid).
Figure 6.32: Sand texture over-
stretched
64-pixel sand decal (which was designed
to represent about one square inch of a sandy floor) has been stretched to cover
the entire desert floor. The result looks nothing like sand even though our decal
provides fairly good realism when viewed unscaled.
Our failure to simulate desert sand here is a case of a reasonable texture image
being applied to the model incorrectly. Implementing texturing in WPF requires
choosing between two mapping strategies: tiling and stretching.
The problem is that our tiny 64
×
to
cover
the
entire
desert floor.
Figure 6.33: Square image of a
brick pattern.
If the texture is being used to simulate a
material
with a consistent look and no
obvious points of discontinuity (e.g., sand, asphalt, brick), the texture image is
replicated as needed to cover the target surface. In this case, the texture is typically
a small sample image (either synthetic or photographic) of the material, which
has been designed especially to ensure that adjacent tiles fit together seamlessly.
As an example, consider the texture image of Figure 6.33 showing six rows of
red brick.
Applying it to each face of a rectangular prismwithout tiling produces a decent
image (Figure 6.34) but the number of rows is insufficient for representing a tall
brick fortress. Tiling allows the number of apparent brick rows to be multiplied,
producing an image (Figure 6.35) that is more indicative of a tall fortress.
Figure 6.34: Result of stretching
one copy of the brick texture onto
each wall.
Consult the texture-mapping module of the lab for details on how to enable
and configure tile-based texturing in WPF.
If a texture is being used as a substitute for a highly complex model (e.g., a city
as seen from above, or a cloudy sky), the texture image is often quite large (to
provide sufficiently high resolution) and may be either photographic or original
artwork (e.g., if being used to represent a landscape in a fantasy world). Most
importantly, this kind of texture image is a “scene” that would look unnatural
if tiled. The correct application of this kind of texture image is to set the mesh's
texture coordinates in such a way as to stretch the texture image to cover the mesh.
For example, in our desert scene, the background sky (as seen often in
Figures 6.5 through 6.17) is modeled as a cylinder whose interior surface is
stretch-textured with the actual sky photograph shown in Figure 6.36.
Figure 6.35: Result of tiling mul-
tiple copies of the brick texture
onto each wall.
Consult the texture-mapping module of the lab for details on how to enable and
configure stretch-based texturing in WPF. More information, including algorithms
for computing texture coordinates for curved surfaces and a discussion of common
texture-mapping problems, is presented in Section 9.5 and in Chapter 20.
Figure
6.36:
Image
of
a
sky
image.