Graphics Programs Reference
In-Depth Information
FIG. 3.34
The standard polygon tools can help straighten out UV edges, which can then be
pinned and the interior polygons can be smoothed using LSCM unwrapping.
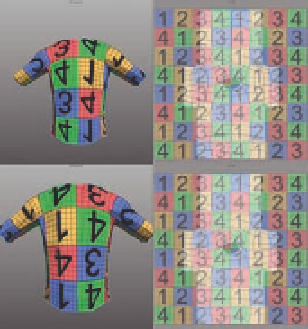
FIG. 3.35
The i nal step involves eliminating the
seam needed for mirroring.
At this point, our work is mostly done and we're ready for cleanup. We need to
mirror our changes on to the second side, l ip one side, and then merge the
two sides together. To do this:
●
First, select the side we've been working on and select
UVs/Materials
>
Mirror UVs
. This will move the side we'd placed on the bottom back on
top of what we've been working on and mirror the UVs.
●
Flip UVs
, another
specialty UV tool, to horizontally l ip one side so you'll be able to slide it
over and get something that looks more like what we started with
( Figure 3.35a ).
With a single side selected, select
UVs/Materials
>
●
Finally, we need to merge the two pieces back into one. This can be
accomplished by selecting the seams on the 3D object and clicking
UVs/
Materials
>
Unmark UV Seams
. There is also a specialized UV command
for merging,
UVs/Materials
>
Move and Sew
, that will move the polygons
with the merge in an attempt to minimize UV distortion. In the case of the
T-shirt, since we already have the square shape we want, our best bet is to
simply unmark the seams.
The i nal product should look something like Figure 3.35b.
To take the texture map into another program, you can export what's in the
UV square as an image by using
UVs/Materials
>
Export UVs to Image
. The
resulting work in the third-party program can then be imported as a texture
and applied to your model.
Conclusion
That covers the main tools and workl ows for Silo. We hope this section
prepares you to take on the project covered in the next several chapters, and
can serve as a reference when working with Silo. Now, on to our main model!